Knowledge to let you go further
Regardless of your destination or your experience level, you should be constantly equipping yourself with knowledge. How to better operate your vehicle, how to treat injuries and even how to ensure you and your travelling party’s survival if the worst should happen.
The information contained in our library is in no way meant to replace formal training and is intended as a guide. We strongly urge you to equip yourself with the appropriate knowledge and training to ensure that you are well prepared when you venture into remote locations. If you would like to get some survival training, then we can highly recommend the survival courses run by Bob Cooper – Outback Survival.
Remember, even equipped with the latest communications equipment, in the event of an emergency, that emergency assistance will take as long (if not longer) to arrive at your location that it took you to get there.

It is common knowledge that up to 60% of the human body is water. Did you know that losing just 1% of that water can result in our body struggling to maintain itself and will result in dehydration. Losing 2-3% means that you are actually dehydrated and the feeling of being thirsty only kicks in after 3% water loss. We not only lose water through perspiration but respiration (breathing) and every drop must be replaced.
Travelling to some of the more remote locations in Australia means that there is a good chance it is going to be warm. Knowing how to stay hydrated is imperative for the safety of everyone in your party.
Know the signs of dehydration
The signs and symptoms of dehydration differ by age.
Infants and young children
- dry mouth and tongue
- no tears when crying
- nappy not wet for three hours
- sunken eyes, cheeks
- sunken soft spot on top of skull
- listlessness or irritable
Adults
- extreme thirst
- less frequent urination
- dark coloured urine
- fatigue
- dizziness
- confusion

How to prevent dehydration
- Vomiting or diarrhoea. If your child is vomiting or has diarrhoea, start giving extra water or an oral rehydration solution at the first signs of illness. Don’t wait until dehydration occurs.
- Strenuous exercise. In general, it’s best to start hydrating the day before strenuous exercise. Producing lots of clear, dilute urine is a good indication that you’re well-hydrated. During the activity, replenish fluids at regular intervals and continue drinking water or other fluids after you’re finished.
- Hot or cold weather. You need to drink additional water in hot or humid weather to help lower your body temperature and to replace what you lose through sweating. You may also need extra water in cold weather to combat moisture loss from dry air, particularly at higher altitudes.
- Illness. Older adults most commonly become dehydrated during minor illnesses — such as influenza, bronchitis or bladder infections. Make sure to drink extra fluids when you’re not feeling well.
Complications
- Heat injury. If you don’t drink enough fluids when you’re exercising vigorously and perspiring heavily, you may end up with a heat injury, ranging in severity from mild heat cramps to heat exhaustion or potentially life-threatening heatstroke.
- Urinary and kidney problems. Prolonged or repeated bouts of dehydration can cause urinary tract infections, kidney stones and even kidney failure.
- Seizures. Electrolytes — such as potassium and sodium — help carry electrical signals from cell to cell. If your electrolytes are out of balance, the normal electrical messages can become mixed up, which can lead to involuntary muscle contractions and sometimes to a loss of consciousness.
- Low blood volume shock (hypovolemic shock). This is one of the most serious, and sometimes life-threatening, complications of dehydration. It occurs when low blood volume causes a drop in blood pressure and a drop in the amount of oxygen in your body.
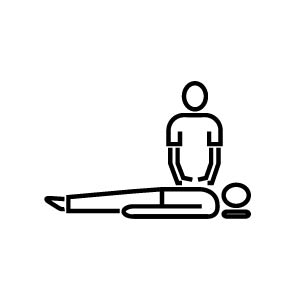
Heatstroke is where your body overheats, usually as a result of prolonged exposure to or physical exertion in high temperatures. Heatstroke occurs where the body’s temperature exceeds 40 degrees celsius. Untreated, heatstroke can result in damage to the patient’s brain, heart, kidneys and muscles. The longer treatment is delayed the worse the damage becomes and increases their risk of serious complications and death. Heatstroke should be treated as a life or death emergency.

Signs and symptoms
- High body temperature. A core body temperature of 104 F (40 C) or higher, obtained with a rectal thermometer, is the main sign of heatstroke.
- Altered mental state or behavior. Confusion, agitation, slurred speech, irritability, delirium, seizures and coma can all result from heatstroke.
- Alteration in sweating. In heatstroke brought on by hot weather, your skin will feel hot and dry to the touch. However, in heatstroke brought on by strenuous exercise, your skin may feel dry or slightly moist.
- Nausea and vomiting. You may feel sick to your stomach or vomit.
- Flushed skin. Your skin may turn red as your body temperature increases.
- Rapid breathing. Your breathing may become rapid and shallow.
- Racing heart rate. Your pulse may significantly increase because heat stress places a tremendous burden on your heart to help cool your body.
- Headache. Your head may throb.

What causes heatstroke?
- Exposure to a hot environment. In a type of heatstroke, called nonexertional (classic) heatstroke, being in a hot environment leads to a rise in core body temperature. This type of heatstroke typically occurs after exposure to hot, humid weather, especially for prolonged periods. It occurs most often in older adults and in people with chronic illness.
- Strenuous activity. Exertional heatstroke is caused by an increase in core body temperature brought on by intense physical activity in hot weather. Anyone exercising or working in hot weather can get exertional heatstroke, but it’s most likely to occur if you’re not used to high temperatures.
In either type of heatstroke, your condition can be brought on by:
- Wearing excess clothing that prevents sweat from evaporating easily and cooling your body
- Drinking alcohol, which can affect your body’s ability to regulate your temperature
- Becoming dehydrated by not drinking enough water to replenish fluids lost through sweating
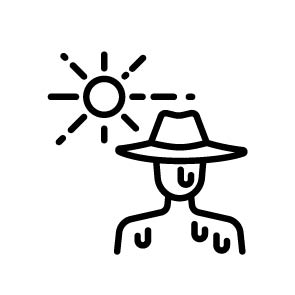
How to prevent heatstroke
Heatstroke is preventable and predictable. Take the following steps to prevent heatstroke during hot weather:
- Wear loosefitting, lightweight clothing. Wearing excess clothing or clothing that fits tightly won’t allow your body to cool properly.
- Protect against sunburn. Sunburn affects your body’s ability to cool itself, so protect yourself outdoors with a wide-brimmed hat and sunglasses and use a broad-spectrum sunscreen with an SPF of at least 15. Apply sunscreen generously, and reapply every two hours — or more often if you’re swimming or sweating.
- Drink plenty of fluids. Staying hydrated will help your body sweat and maintain a normal body temperature.
- Take extra precautions with certain medications. Be on the lookout for heat-related problems if you take medications that can affect your body’s ability to stay hydrated and dissipate heat.
- Never leave anyone in a parked car. This is a common cause of heat-related deaths in children. When parked in the sun, the temperature in your car can rise 20 degrees F (more than 11 C) in 10 minutes. It’s not safe to leave a person in a parked car in warm or hot weather, even if the windows are cracked or the car is in shade. When your car is parked, keep it locked to prevent a child from getting inside.
- Take it easy during the hottest parts of the day. If you can’t avoid strenuous activity in hot weather, drink fluids and rest frequently in a cool spot. Try to schedule exercise or physical labour for cooler parts of the day, such as early morning or evening.
- Get acclimated. Limit time spent working or exercising in heat until you’re conditioned to it. People who are not used to hot weather are especially susceptible to heat-related illness. It can take several weeks for your body to adjust to hot weather.
- Be cautious if you’re at increased risk. If you take medications or have a condition that increases your risk of heat-related problems, avoid the heat and act quickly if you notice symptoms of overheating. If you participate in a strenuous sporting event or activity in hot weather, make sure there are medical services available in case of a heat emergency.
Treatment
- If you suspect someone is suffering from heatstroke then it is best to act immediately. Depending on your location, make contact with the emergency services ASAP (mobile phone, HF radio, UHF radio, satellite phone)
- Get the patient into the shade or indoors. If there is no shade then you need to fashion some with whatever you have nearby.
- Remove excess clothing
- Cool the patient by whatever means available. Immerse in water, sponge with wet cloth or flannel, ice packs or wet towels on the patient’s head, back of their neck, armpits and groin.
- If you are remote and unable to call for help then get the patient to the nearest medical facility by the quickest means possible.
If you believe the hype or have never lived here, you would be forgiven for thinking that Australia is seething with venomous snakes and if you step outside you are more than likely to die from getting bitten. The reality is this, yes we have a lot of snakes (about 170 species of land snakes have been recorded) and some of them have venom that is more toxic than most other snakes on earth.
The reality is that there are very few snake bites in Australia (and since the development of anti-venom, deaths are even more rare) with an average of 4-6 deaths per year. Compared to places like India, where they record more than 1 million bites per year and over 50,000 deaths.
Understanding why people get bitten and how snake venom actually affects the body is important. Knowing how a snake behaves and the mechanism behind how they bite is also crucial.
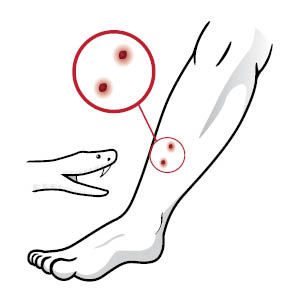
A snake bite is always fatal
This is NOT correct. Snake venom is not a poison that kills its victim quickly. Snake venom breaks down the internal organs, allowing the snake to then ingest it. For it to do significant injury to a human, it must first travel through the lymphatic system and enter the blood stream.
Left untreated, snake venom will result in serious complications and even death.
Snake venom travels through the body via the lymphatic system and only enters the blood stream once it has travelled along the bitten limb and enters through either the thoracic duct or subclavian vein (depending on what side of the body the patient is bitten).
The entry into the lymphatic system is directly related to the size of Australian snake’s fangs. They are quite small and only able to puncture the skin a short way.
Slow the flow
The lymphatic system uses MUSCLE CONTRACTIONS to move the lymph fluid around the body. By not moving, staying calm and applying compression to the affected area you will slow down the movement of lymph.
Pressure
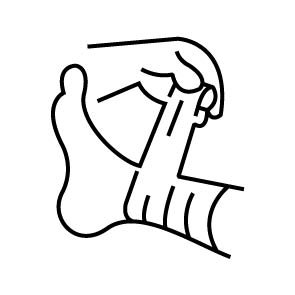
The most effective treatment for snake bite is PRESSURE and IMMOBILISATION. In the event of a snake bite, take the following steps:
- Calm the patient. Sit them down as soon as it is safe to do so. Assure them that they are going to be OK and that by bandaging the bite you are slowing the movement of the venom to a trickle.
- Have someone call 000 or make contact using what ever communications method you have.
- Remove any watches or jewellery that the patient is wearing on the bitten limb. Remove their shoe and sock (if it is a leg bite) but DO NOT remove their pants as this will create excessive movement and speed up the movement of the venom.
- Apply your first bandage. Start approximately 20 cm above the bite site and bandage DOWN the limb. The pressure should be tight enough that you can push one finger under the wrapping. Each wrap should cover 50% of the width of the previous wrap. Leave fingers or toes uncovered so that circulation can be monitored.
- The SECOND bandage should start where the first started but you will bandage UP the limb.
- Excess bandage should be rolled up and tucked into itself (do not continue wrapping the limb to use up excess bandage)
- If the bite is on a leg then you may need a third bandage to be able to reach the groin.
- Ensure you mark the bite site with a pen or marker directly onto the bandage. Also include the time of the bite and any known allergies (ask the patient) and include that in your bandage notes.
DO NOT TRY TO KILL OR CAPTURE THE SNAKE.
Check circulation
Once you have completed bandaging the limb, check the patient’s circulation by gently squeezing the blood out of a finger or toe. Within 4 seconds you should see the blood return. If the blood does not return or the patient reports the bandage is too tight or painful, remove and rewrap one bandage at a time. Recheck the circulation.
What about the immobilisation?
Once you have completed the bandaging you need to ensure that the patient cannot move.
- If the patient was bitten on the leg, bandage their legs together.
- For an arm bite, consider securing their arm to their leg.
Keep your patient comfortable and DO NOT allow them to move. They will need to be carried or another means of moving them found.
What about if the bite is not a limb?
The majority of snake bites will be on an arm or leg. If the patient is somehow bitten on their body, face or neck then you must apply pressure immediately and seek medical assistance by the fastest possible means. Where possible, apply a bandage but do not restrict the movement of the chest.
Snake bite myths
DO NOT:
- wash the bite site
- use a tourniquet
- elevate the limb
- apply an ice pack
- attempt to catch or kill the snake
- try and suck out the venom
Signs and symptoms of snake bite
It is not always obvious that someone has been bitten by a snake. The following symptoms start to manifest themselves once the venom has entered their blood stream:
- blurred vision
- abdominal pain
- headache, nausea and vomiting
- irritability and confusion
- blood coloured urine
- painful and tender muscles
- difficulty in breathing
- they may go into shock, collapse or become unconscious
How to avoid getting bitten
Not getting bitten should be everyone’s first priority. There are some very simple things you can do to reduce your chances of getting bitten:
- Wear closed in footwear when bushwalking (thongs are NOT suitable footwear).
- Wear loose-fitting long pants or gaiters. Remember, Australian snakes have small fangs and cannot penetrate through material of pants or gaiters AND your skin.
- Use a walking pole or stick to probe in front of you if walking in long grass.
- Never approach a snake. We are much bigger than they are and they only want to get away from us.
- Stay calm and do not wave your arms around. Keep your feet grounded and shuffle backwards away from the snake. Lifting your foot up could initiate a strike from the reptile.
- Avoid letting your shadow fall over the snake.
- Always carry a snake bit kit with you.
- Don’t reach under logs or place your hand into rock crevices.
Can I carry antivenom?
The simple answer is NO. Snake antivenom can causes an allergic reaction in a small percentage of the population (which cannot be tested for) and therefore should only be administered at a medical facility.
Two types of bites
Snakes don’t always deliver venom when they bite.
A Dry bite involves the snake striking the patient but not releasing any venom. They are almost always painful and will cause redness and swelling around the bite site.
A Venomous bite is the same as a dry bite but also involves the release of venom.
There is no way for you to tell in the field what sort of bite the snake has delivered. Treat all bites as venomous and apply pressure and immobilisation. Seek medical advise ASAP.
There are plenty of opportunities where a burn could occur, be it around the camp fire, scalding water or picking up a hot fry pan. Burns can occur from touching a hot engine or even getting sunburnt. The severity of the burn will dictate the treatment required.
There are 3 types of burns:
- First degree – superficial. The burn is limited to the first layer of skin. It is red and painful. A sunburn is considered a first degree burn.
- Second degree – partial thickness. Damage to the first and second layer of skin. Area is red, peeling and blistered and swelling with clear or yellow coloured fluid.
- Third degree – full thickness. Damage to first and second layers of skin as well as the underlying tissue. Burn site appears black or charred, with white, exposed fatty tissue. Nerves are destroyed which results in less pain being experienced.
The main aim when managing a burn is to control pain, remove dead tissue, prevent infection and reduce scarring.
If a burn or scald does occur and requires treatment, the first aid is the same for all types.
Remove
Remove all jewellery from around the burn area. Remove any clothing and nappies around the burn area unless stuck to the skin.
Cool
Cool the burn under cool running water for no more and no less than 20 minutes.
DO NOT use ice or creams as this can further damage the skin.
Cover
Cover the burn loosely with cling wrap or a clean, damp lint-free cloth
Seek
Seek immediate medical advice if the burn is:
- larger than a 20-cent coin
- on the face, hands, groin or feet
- deep or infected
- caused by chemicals or electricity
There are 3 types of fractures, known as:
- Complete – the bone is broken into at least two complete parts.
- Greenstick – a partial fracture which splits the bone on one side and bends the bone on the opposite side.
- Comminuted – a break where there are multiple fragments of bone as a result of the break.
Fractures are then categorised further as:
- Open – the fracture causes the skin over the break to tear or bulge.
- Closed – there is no breakage of the skin. There will still be bleeding under the skin and localised swelling.
- Complicated – the fracture causes further injury.
Signs and symptoms:
- Pain
- Redness
- Loss of mobility
- Sensitivity
- Sound of bone grating against each other
- Sound of the bone breaking or cracking
- Swelling

DRSABCD
- Check for Danger
- Look for a Response
- Send for help
- Check Airway
- Check Breathing
- Start CPR (if required)
- Attach Defibrillator (if required)

Cover
Cover wounds and apply pressure to halt bleeding

Check
Check for other fractures (open, closed or complicated)
Immobilise
Request casualty does not move
Bandage
Immobilise the fracture with wide bandages above and below joints to prevent movement.
- Apply the bandages under the natural hollows of the body to support the limb (handle with care)
- Create a splint with padding and apply to the injured area
- If it is a leg fracture you must immobilise the foot and ankle
- After applying the splint you must check that it is not too tight or too loose in 15-minute intervals
- Check for signs or circulation loss in the foot or hand.
- Observe casualty closely
As well as the obvious sign of blood coming from a wound, signs and symptoms of severe bleeding include:
- weak, rapid pulse
- pale, cool, moist skin
- pallor, sweating
- rapid, gasping breathing
- restlessness
- nausea
- thirst
- faintness, dizziness or confusion
- loss of consciousness
To treat a bleeding wound, follow these steps:
DRSABCD
- Check for Danger
- Look for a Response
- Send for help
- Check Airway
- Check Breathing
- Start CPR (if required)
- Attach Defibrillator (if required)
Glove up
If you have gloves, put them on.
Take a load off
Help the patient to lie down. Remove or cut away the patient’s clothes to expose the wound.
Pressure
Apply firm, direct and continuous pressure to the wound, initially with your hands, until the bleeding stops.
When available, apply a pad or dressing in or directly over the wound and continue to apply the same firm, direct and continuous pressure until the bleeding stops.
If there is an object protruding from the wound, apply pressure to either side of the wound and place pads around the object before bandaging.
Secure the wound
Once the bleeding is under control, secure the wound by bandaging firmly, ensuring the pad remains directly over the wound.
Continue to observe for further bleeding.
Ensure that the patient’s vital signs (consciousness, breathing and pulse) are monitored.
DO NOT give them anything to eat or drink.

Uncontrolled bleeding
If you cannot control the bleeding and it is on a limb, you may need to apply an arterial tourniquet (if you have one) and tighten until the bleeding stops.
This WILL cause the patient pain and you need to let them know before hand.
If the wound is NOT on a limb, remove existing dressings and apply a haemostatic dressing (if you have one) in or directly over the wound. Reapply firm, direct and continuous pressure until the bleeding stops.
A haemostatic dressing is a type of field dressing which is impregnated with an inert mineral that, on direct contact with blood, initiates the clotting process.
Eye injury prevention is much better than the treatment. Ensure everyone is wearing sunglasses (during the day) and if there is any machinery (eg. chainsaw) being used that everyone not involved is kept well clear. If walking around the campsite at night, ensure you have plenty of light to prevent walking into low hanging branches.

Eye wound
- DRSABCD
- Place an eye pad or clean dressing over the injured eye.
- Get the patient comfortable.
- Ask the patient to reframe from moving their eyes.
- Seek medical assistance.
Object in the eye
- DRSABCD
- Ask the patient to look up.
- Draw the lower eyelid down. If the object is visible, attempt to remove it with a moist cloth.
- If the object is not visible, pull the upper eyelid down.
- If unsuccessful, wash the eye with sterile saline or clean, cool water.
- If unsuccessful, cover the injured eye and seek medical assistance.
Embedded object in the eye
- DRSABCD
- Cover the injured eye with an eye pad or clean wound dressing.
- Seek medical assistance.
Penetrating object from the eye
- DRSABCD
- Call 000 by any means available.
- Lie the patient down.
- DO NOT try and remove the object.
- Cover the injured eye by placing thick pads or clean cloth, above and below the eye, or cover with a paper/plastic cup.
- Bandage the cover in place, ensuring that there is NO pressure on the eyelids.
- Ask the patient to keep their eyes as still as possible.
- DO NOT give the patient anything to eat or drink.
If in a remote location, common sense needs to prevail with the giving of water to drink. You will need to ensure that the patient does not become dehydrated (and then introducing new complications) while waiting for medical assistance.
Burns
- DRSABCD
- Gently open the eyelid and wash it with cool, flowing water for 20 minutes.
- Cover with an eyelid or clean dressing.
- Seek medical assistance.
Smoke
- DRSABCD
- Ask the patient to not rub their eyes.
- Wash the eyes with sterile saline or cold water.
- Seek medical aid if necessary.
Most people will be aware of any allergies and it is good practice, if travelling with a group, to ensure that there is a record of everyone’s medical history in the event that it is needed. Refer to our Personal Medical Information form and use it as a guide as part of your trip planning process. If there are members of your group who suffer from severe allergies, it is important that everyone knows about them before you head off. Everyone should know how to react to a severe allergic reaction, as per that person’s plan. This may involve knowing that they carry an Epipen, and where they carry it.
The signs of a mild allergic reaction can be best summed up as:
- swelling of the lips, face and eyes
- hives or welts
- tingling in the mouth
- abdominal pain, vomiting (these are associated with anaphylaxis related to an insect allergy)
The patient may exhibit some or all of these signs and symptoms.
A severe allergic reaction can include:
- difficult or noisy breathing
- swelling of the tongue
- swelling or tightness in the throat
- wheeze or persistent cough
- difficulty talking or a hoarse voice
- persistent dizziness or collapse
- young children may become pale and floppy
- abdominal pain, vomiting.
Severe reaction
- Lay the person flat and keep them laying down.
- Give adrenaline injector
- Make contact with medical assistance
- If there is no response after 5 minutes then a second round of adrenaline may be given
- Convey the patient to the nearest medical facility for observation.
- Be prepared to start CPR if the patient becomes unresponsive or stops breathing
While waiting or transporting the patient to medical assistance, they MUST remain under constant observation.
Adrenaline first
Even if the patient has an asthma puffer and is having difficulty breathing, ALWAYS give them the adrenalin FIRST.
Be prepared
If you are at risk of a severe allergic reaction, make sure:
- You have an action plan (consult with your Dr)
- Have a means of contacting help if needed
- Always carry an adrenaline injector (EpiPen or Anapen)
- Wear medical identification jewellery
- Avoid medication (where it is possible) that nay increase the severity of an allergic reaction.
- Avoid the allergen where possible

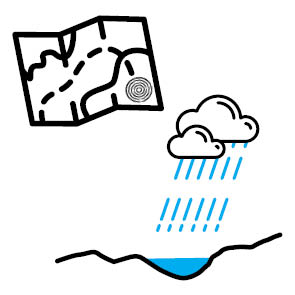
There are various methods by which water can be procured. Knowing how could be the difference between life and death.
The Transpiration method
This is a simple way of securing a reliable water supply. All you need is a clear plastic bag (the larger the better), some string, and for the best result, a small piece of cloth.
- First identify a tree branch (with leaves) that is getting plenty of sun. You also want to make sure that the tree is not toxic to humans. You are safe with any type of gum tree.
- Look for and remove any bugs, spider’s eggs, bird droppings or other things that could contaminate the water collected.
- Cover a section of branch (leaves and all) with the plastic bag.
- Bunch the bag up at the top, placing the piece of cloth where you intend to tie the bag off.
- Secure the bag closed by using some string (or a shoe lace) so that you create an air tight seal.
- Aim to drain the water collected every 4 hours or so. To do this you will need to cut a small hole at the lowest point. Once collected, secure the hole by tying it up.
- If possible, purify the collected water by either sterilisation or boiling.
By placing the bag over the branch you create a heat stress for the plant. The tree responds by pumping water into that section of branch in an effort to cool it down. This is known as transpiration.
The longer you leave the bag in place the more water you will collect.
NB: Black bags do not work as well as they block all of the light and make the tree think it is night time. Photosynthesis doesn’t occur at night.
Solar still
A solar still is a simple construction that uses a large box or esky that can be filled with green leaf matter with a water collection vessel placed within it.
Creating an airtight plastic over it, with a weight placed on the plastic over the collection vessel, the solar still is an effective and low effort means of collecting drinkable water.
This method is not as efficient as the transpiration method and you would need to set up multiple stills to collect enough water.
As a society, we have pretty much forgotten the natural signs of where and how to find water. We are so conditioned now to only look for water from a tap or other obvious locations, however, if you stop and observe what is around you, you might be surprised at what you find.
Man-made sources
Refer to your map. Do you see the windmill sign? They are usually marked on topographic maps (if you are this far out we are going to assume you ARE NOT using Google Maps). Most windmills have a water tank and/or water trough attached to it.
DO NOT drink directly from a water trough. You will more than likely get sick. The water needs to be treated first, either by a sterilisation tablet or boiling. The best source of cleaner water will be from the pipe that feeds the water tank. Take care as they can be fragile.
Treat windmills with respect:
- leave them as you find them
- don’t shift any pipes as they may break
- do not swim in the tank
- do not use soap around a windmill
- do not wash clothes at a windmill
- do not leave rubbish, traces of blood or blood products
- do not light a fire within 50m (if you are just visiting then you should be more than 200m away) of the windmill
- be aware of snakes around the mill and under troughs.
Gnamma holes
Sometimes these are marked on maps and are traditional sources of water for the indigenous occupants of the area. They are usually formed by a depression in the rock that collects rain water. They are quite often covered with a flat rock to prevent evaporation.

Follow the birds
Seed eating birds must drink every day. They are creatures of habit, drinking in the early morning and late afternoon. When birds are flying to water, their formation is tight and they take the most direct route to it. Birds flying away from water are much more relaxed.
The smaller the bird, the closer they remain to water, with smaller species like finches usually straying no more than 2km from their water source.

Insects have to drink too
Insects like European bees, dragonflies and some wasps can take you directly to their water source. It might not be immediately obvious and may require the use of items such as a rag to collect the water.
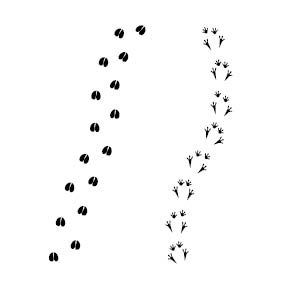
Animal tracks
The majority of animals that you are likely to come across will be grass eaters. As a result of their diet, they also need to drink every day. Animals like cattle, wild horses, kangaroos, sheep or goats all tend to use the same well-worn paths. These paths can lead you directly to their water source.
To make sure that you are heading in the right direction, look for tracks that converge like an arrow head. Look at the surrounding topography to give you other clues as to where the water source may be.
Check your vehicle
Even though you might have either run out or did not bring enough water with you, your vehicle can still be a potential source.
The washer bottle can hold several litres and, as long as you don’t use detergent or other chemical additives in the water, is drinkable. You will have to disconnect the hose from the bottom of the reservoir to allow you to drain it into a container.
If the engine still runs you can get condensation dripping from the air conditioner beneath the vehicle. Place a container in the right spot and collect the water.
The nights can get quite cold in the outback or desert. You will often find a layer of moisture has formed on the windscreen. Use a credit card or something similar to “squeegee” the condensate to a point where you can collect it. You may find using a piece of material easiest to soak it up before wringing out into a container.

Take a walk through the long grass
As with condensation forming on your vehicle, moisture can be found early morning on many desert grasses. Walking through them will more than likely soak the legs of your pants, which can then also be wrung out and the water collected.
Nothing will knock you down faster during a survival situation than drinking contaminated water. It is essential that all sources of water are made safe to drink. There are a variety of methods to do this and being familiar with them is critical.
Clarifying
Clarifying water is simply the act of filtering out solid material from the water. It can make it more palatable to drink but DOES NOT make it safe to drink.
Straining water through some cloth, using something like a Milbank filter or even a shirtsleeve packed with sand and charcoal are methods of removing solid contaminant from water.
A method used by Aboriginals in the Great Sandy Desert (and other places around the world) is to use a gypsy well. This requires you to dig a small hole near the water source (that is heavily contaminated with mud etc) and wait for the water to filter through the sand into the hole.
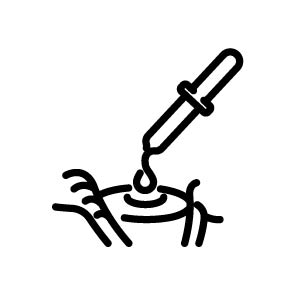
Purification
Purification is the act of making water safe to drink. Again, there are multiple ways of making water safe to drink.
- Chemical methods
- Purification tablets. These are cheap and small enough to carry. Dropping one into a water bottle and waiting the allotted time produces water that is fit to drink. It will more than likely have a strong chemical taste.
- Iodine. Several drops into water and again left to stand can produce water safe enough to drink.
- Condy’s Crystals (Potassium Permanganate) can purifiy water with just a few tiny crystals. Using more can also produce a solution that can be used to clean wounds and act as a topical anti-bacterial.
- Non-chemical means
- Boiling is the most effective method for purifying water. Almost anything that would cause humans harm through ingestion, can be killed by temperatures above 70 degrees celsius.
Salt into fresh water
Salt water should never been consumed. Salt water can, however, being distilled into fresh water with some work. You would need:
- a fire
- a suitable container to boil the salt water in
- a means of creating an airtight cone on top of this container
- a hose connected to the funnel
- a vessel to catch the distilled water in
Boiling the salt water creates steam. The airtight cone directs the steam into the hose, where, if you can coil it enough, the steam condenses back into water. Directing the hose into a vessel provides you with water.
This method requires that you have enough fuel to keep the fire burning and you need to ensure that you are careful not to get burnt by the fire, boiling water or the steam being produced.
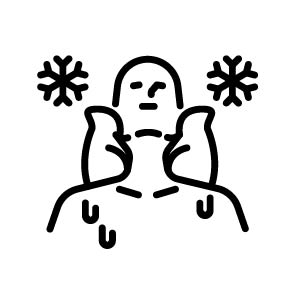
Even being in a hot climate like Australia, the risk of hyperthermia in remote areas is still a risk at night. Temperatures can drop dramatically and you need to ensure that you protect yourself from the cold.
- Build a small fire and ensure that you have an adequate fuel supply to keep it burning through the night.
- Use excess wood or other materials to create a wind-break for you and your party
- If sleeping around a fire, create a small barrier to prevent anyone from rolling into the fire in their sleep (we tend to roll towards sources of warmth when asleep)
- Use layers of clothes for added warmth.
- Use layers of material above and below you when sleeping to prevent heat loss through the ground and to create a warm “bubble” of air around you
Remember, you will not be graded on any survival shelter that you need to construct. Your priorities for the shelter must be protection from:
- rain
- cold
- wind
- sun
You need to achieve this with the least amount of effort possible.
The idea of a signal device is to ensure that you can get the attention of a potential rescuer. With everyone, the least amount of effort for the best possible outcome is the goal. There is no point digging up and hauling a pile of rocks out to an open area so that you can spell out HELP when a stick and some rudimentary drawing skills with achieve the same result. A potential rescue could occur at any time, so you need to ensure that by whatever means you have chosen, that the device or signal is always ready to use.
- Daytime
- If you have a signal fire, do you have enough fuel to keep it burning continuously? If not, better to have a pile of fuel ready to light at a moment’s notice. You might need to have some diesel from the vehicle ready to assist with the lighting of the fire and to produce some black smoke. Do you have other items that will produce smoke (i.e. green leaves or wood) to get the search party’s attention? Your spare tyre can be used as a once-off source of fuel. It will produce a very oily smoke that is sure to be seen.
- Is your signage or message clear and large enough to be seen? Do you need a secondary signal source like a mirror (the rear view mirror can normally be removed from a vehicle easily) to try and attract attention?
- Nightime
- If a signal fire is to be used at night then you want less smoke and more fire. Ensure that the fuel pile is sufficient to produce a good size flame. It may need to be positioned on high ground.
- If you have a battery operated signal flare, conserve the batteries until you hear an aircraft or vehicle. They can be seen from a great distance but you have a limited use as they do consume batteries quickly.
If using a signal fire, ensure that there is plenty of cleared space around it. You don’t want to make a bad situation worse by creating an out of control bush fire.
In recent years, no-one has ever perished, while being stranded in Australia, due to lack of food. The human body can survive a surprisingly long time without food. With that said, it doesn’t hurt to ensure that when you are travelling that you have an emergency supply.
Tinned food
There are plenty of cheap options of carrying some extra tinned food that does not require refrigeration and can still be used as part of your tucker box.
Packet meals
Packet pasta and soups are extremely light-weight and it is easy to carry a quantity of extras that can also be used in an emergency. The requirement for water can put pressure on your water supply if it is getting low however.
Ration Packs
Anyone who has served in the Army will most likely break out into a cold sweat at the very mention of a ration pack. Like them or hate them, the boffins at DSTO have spent a lot of time ensuring that the contents packed into them supplies enough calories for a soldier to do their job in a combat environment.
There are a few options commercially available that mimic the contents and make a viable emergency food supply solution for remote area travel.
We carry 8 days worth in the Ranger when heading out with each pack containing enough calories to sustain an adult for 24 hours. From previous experience, you can reduce your daily calorie intake and extend the life of each pack

Technology has come a long way, making it safer to travel into remote locations. A Personal Locator Beacon (PLB) is easily carried and should remain with you when you exit your vehicle. It needs to be easily accessible at all times and you should ensure before leaving on a trip that the beacon is fully functional.
In the event of an emergency, pressing the button on the beacon WILL get the attention of the authorities. Remember, after pressing the button, the cavalry will be on their way BUT it can take time for them to get organised and get out to your location. Carrying a PLB should not be a substitute for good planning and preparation.
There is a great government resource that covers PLBs currently available in Australia. Always purchase from Australian resellers (not online overseas) to ensure that you have a compatible and compliant unit.
PLBs
Personal Locator Beacons (PLB) are the smaller cousin of the more well known Emergency Position Indicating Radio Beacons (EPRIB) and come in many shapes and sizes. They are relatively inexpensive, smaller and more easily transported (compared with an EPIRB) and are designed to stay with an individual.
If you have an older device, it is worth checking that it is not a 121.5MHz distress beacon as they are no longer detected. If your beacon is one of these then you will need to upgrade to the digital 406MHz units.
In the event of an emergency, activating the beacon will set off a chain of events that ultimately result in someone coming to look for you. The carriage of a beacon does not mean that you can disregard a comprehensive plan. The activation of a distress beacon will not result in the immediate presence of a rescue party. Remember, the more remote you are, the longer it will take for help to arrive.
Satellite phones give the user the ability to have a two-way communication (as opposed to a PLB where you press a button and wait for help) staying in contact with anyone. Just like a mobile phone, they are required to be connected to a network for them to function. This involves either being on a monthly plan or having pre-paid credit to make and receive calls. Anything related to satellite calls will be expensive and you need to weigh up the costs associated with using a satellite phone.
For a satellite phone to work, its antenna must be able to see the sky. If you are in a valley with steep walls you may not be able to get a signal and will need to get to higher ground to be able to establish a link. Unless your vehicle is equipped with an external antenna, you will also have issues using the phone from within a moving vehicle and will more than likely need to stop and get out to use it.
Rent, buy or share
There are companies that rent out satellite phones, you can purchase a phone or if travelling with a group, share the costs of the phone between everyone to make it more economical.
There is currently 4 satellite phone networks in use in Australia. All four carriers offer post-paid plans which start from as low as $15 per month. The more expensive the plan each month, the lower the cost of the outgoing calls.

Iridium
The Iridium network provides satellite coverage across a multitude of countries, including Australia. Their network covers the entire continent and up to 200 nautical miles off-shore.
Telstra offers a range of plans across the Iridium network.
There is also the option for prepaid services with Iridium.

Globalstar
The Globalstar network operates a smaller satellite constellation than the iridium one and covers the majority of the Australian continent. It does have issues with coverage across the northern part of the country and may not be suitable if you are heading north.

Thuraya
Turaya operate two geosynchronous satellites that stay in approximately the same position, covering the entire continent.
Along with satellite phone handsets, there are also compatible satellite sleeves that allow you to use your smart phone instead of a dedicated satellite phone.

Inmarsat
Inmarsat also uses geosynchronous satellites and offers coverage across the entire continent for both voice and data. Their devices are split between voice and fixed maritime phones.
Pre-paid phone plans are available with this carrier.
High Frequency or HF radio is another long range communication tool available for use within Australia. Where the initial purchase of a satellite phone may be relatively cheap (compared to a HF radio unit) the ongoing costs may prove prohibitive. HF radios come with a higher entry cost to purchase but once installed, have a very low yearly operating fee. The ongoing fees for operating a HF radio are always associated with holding a current licence (which can be achieved by joining a HF radio group).
HF radio is capable of transmitting over 3000km, dependent upon frequency, equipment and atmospheric conditions. Vehicle to vehicle communications is achievable up to about 100km, although this is not recommended.
The three main HF radio manufacturers in Australia are:
Joining a HF Radio group is the only way you can obtain a licence to transmit as a recreational user. Each group offers different capabilities and you should look at each before making a decision. The following is a list of HF Radio groups currently operating in Australia:

VKE-237
The H.F. Radio Club Inc. has an online presence here with the website having a public access and members only sections.
They offer SMS, GPS tracking, phone patch, RFDS entry, general voice frequencies, and controlled network SKED voice networks.
This network operates from Cue WA, Alice Springs NT, Townsville QLD, and Hume NSW.
VMS-469
Reids RadioDate, otherwise known as The Bush Telegraph, this group operates on five frequencies.
This network provides HF email, phone patch, and daily voice SKEDs. Five general communication channels spread over a wide frequency range providing users with radio coverage up to about 3,500km. Operators can re-direct your call to RFDS. This is the most affordable of the HF networks.

VKS-737
The VKS-737 Radio Network Inc. is the most established 4WD radio group in Australia, and holds Land Mobile licences issued by the Australian Communications and Media Authority (ACMA) permitting the operation of mobile units and base stations on the frequencies of VKS-737 and bases of the RFDS.
They have base stations located in Derby (WA), Mount Isa (QLD), Charleville (QLD) Cairns (QLD), Carnarvon (WA), Meekatharra (WA) and Port Hedland (WA).

HF OZ
A HF network, without SKEDS – but providing RFDS selcall patch, vehicle-to-vehicle voice comms, GPS location logging, SMS, HF phone patch, and HF email. Marketed toward long-term remote travellers / nomads, and maritime stations. Radtel and HF OZ split these frequencies so as not to overlap data with voice.
VMD-750
Austravel Safety Network provides access to emergency facilities via bases. Provides several daily skeds via volunteer based stations at Alice Springs NT, Casino NSW, Perth WA, Kununurra WA, Shepparton VIC, Mareeba QLD.
Also provides GPS tracking and Telcall Plus service – including HF to mobile SMS, GPS Tracking of users VIA mobile/smartphone APP, telephone patch, and HF Mailbox.

Australian HF Touring Club
The Australian HF Touring Club provides access to emergency facilities via bases. SMS, Telcall, GPS Tracking, RFDS Direct Dial, General Chat Nets.
Bases in Hunter Valley NSW, Sapphire QLD, Perth WA, Alice Springs NT. (Derby WA to be commissioned).
You would be surprised where you can find a mobile signal. They usually pop up when you are least expecting it and are usually associated with the mobile phone infrastructure that has been installed to service remote mine sites and other installations. There are places where, standing on one leg and holding your mouth just so, you can get a bar or two of signal, enough to get a quick call out to friends or family.
The other option is to invest in a mobile phone booster. We have only come across one worth its salt.

Cel-Fi GO
The Cel-Fi GO is a unit that can be installed in your vehicle or your home (there is a seperate unit for mobile or stationary installs) and, once connected to an external antenna, provides up to an additional 65dB of gain.
This effectively boosts the reach of your mobile device and allows it to establish a stronger connection than if it tried to connect using its own internal antenna.
The Cel-Fi will only provide a signal boost to devices in its immediate area (i.e. located in the vehicle) and are locked to a particular network. For anything outside of the major population centres in Australia, we only recommend Telstra for mobile services.
If you are ordering a unit, ensure that it is the one for your mobile phone carrier.

Telstra Coverage
Telstra have a pretty accurate coverage map.
We have given up trying to use any other carrier. Leaving any metro area and your options are severely limited with Telstra having the largest coverage footprint.

Optus Coverage
The Optus coverage map can be found here.
Of interest is the switch of many government agencies from Telstra to Optus. What this means for remote travel is that all Ranger Stations in National Parks now have a small Optus tower associated with their location.
We tend to carry a pre-paid Optus card for use in these locations.

Vodafone Coverage
The Vodafone coverage map is here.
If you are leaving the metro area and using Vodafone, we can only suggest getting a pre-paid sim to suit your location.
When communicating pertinent information over HF radio, satellite phone or even a sketchy mobile connection, it may be required that you need to resort to using the phonetic alphabet to ensure that the information you are relaying is clear and understood. There is nothing worse than getting told to Foxtrot Uniform Charlie Kilo Oscar Foxtrot Foxtrot and not knowing what was said.
Here in Australia, we default to the NATO phonetic alphabet.
| Letter | Word | Spoken As | Letter | Word | Spoken As | |
| A | ALFA | AL FAH | N | NOVEMBER | NO VEM BER | |
| B | BRAVO | BRAH VOH | O | OSCAR | OSS CAH | |
| C | CHARLIE | CHAR LEE | P | PAPA | PAH PAH | |
| D | DELTA | DELL TAH | Q | QUEBEC | KEH BECK | |
| E | ECHO | ECH OH | R | ROMEO | ROW ME OH | |
| F | FOXTROT | FOKS TROT | S | SIERRA | SEE AIR RAH | |
| G | GOLF | GOLF | T | TANGO | TANG GO | |
| H | HOTEL | HOH TELL | U | UNIFORM | YOU NEE FORM | |
| I | INDIA | IN DEE AH | V | VICTOR | VICK TAH | |
| J | JULIET | JEW LEE ETT | W | WHISKY | WISS KEY | |
| K | KILO | KEY LOH | X | X-RAY | ECKS RAY | |
| L | LIMA | LEE MAH | Y | YANKEE | YANG KEY | |
| M | MIKE | MIKE | Z | ZULU | ZOO LOO |
With some practice, you can get very quick relaying information using the phonetic alphabet. Practice next time you receive an overseas scam call, where you can tell the Whiskey Alpha November Kilo Echo Romeo to Juliet Uniform Mike Papa India November Alpha Lima Alpha Kilo Echo.
Have fun.

We are getting lazy when it comes to finding our way. Our reliance on a device telling us where to go leaves us very vulnerable if and when that device no longer works. Knowing and practicing the basics of navigation are a great skill to have. To be able to navigate without an electronic device, you need 3 items:
- a topographic map of the area that you are in
- a compass
- a means of marking the map

Map basics
All maps contain:
- a title
- lines of latitude (remember lat is flat)
- lines of longitude
- a north point
- a legend
- a scale
- symbols
Locating yourself on the map
For this exercise we are going to assume that you know where you are. With the map laid out in front of you:
- Locate yourself on the map and mark it
- Reading from left to right, find the nearest grid line) or line of longitude)
- Next identify the closest horizontal grid line (line of latitude)
A good way to remember this is that you have to walk inside the house before you can go upstairs.
... But I don't know where I am
A method of locating yourself on a map when you don’t know your location is by using a method called resection.
For this method to work, you must first orientate the map with north.
- Lay the map flat
- Find the north marker
- Place your compass on the map with its edge running along the magnetic north line
- Turn your map underneath the compass until the north seeking arrow on the compass is pointing in the same direction as the magnetic north line
Once you have orientated your map you can:
- Look for a prominent terrain feature that is to the left of your position. Located it on the map.
- Place your compass on the map, with the edge running through the centre of that feature and draw a line backwards towards your vantage point
- Find another prominent position to your right and again locate it on the map.
- Place your compass on the map, with the edge running through the centre of that feature and draw a line backwards towards your vantage point
- Where the two points intersect should be your position.
Navigating
Once you know your location, you can pick a point on the map that you want to navigate to.
- Mark the location on your map
- Draw a line between it and your current location
- Ensuring that your map is orientated correctly, place the edge of your compass along the line (called direction of travel)
- Your bearing will line up with compass bezel
Most people rely upon some form of GPS. This can be in the form of an app on your mobile phone, a dedicated unit that sits on the dash of your car or even the factory supplied head unit of your vehicle. For turn by turn navigation and direction in a built up area these solutions are more than adequate. When you travel into a remote area and you no longer have the benefit of mobile or internet coverage these solutions quickly become useless.
GPS
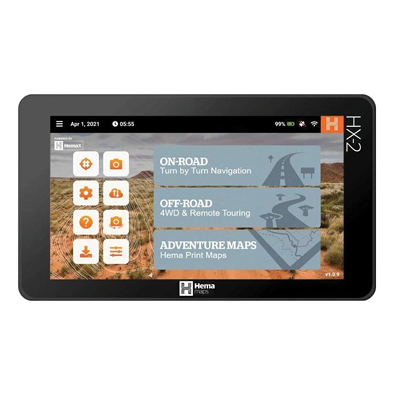
Our GPS serves double duty as an off-road guide and topographic map reference. The HEMA HX-2 also provides turn by turn navigation if we need it.
The map data provided by HEMA is known for it exceptional accuracy as HEMA is the only company that we know of that is active in mapping activities involving on the ground data acquisition.
They have a cartographic team who work behind the scenes to ensure that the map data is always accurate.
HEMA Mobile App
We also have the HEMA app installed on several mobile devices. The beauty of this is that we can mark the location of our camp or vehicles before going for a walk and the app will give us real-time placement of our location and easily guide us back to our starting point.
I have also used this method of navigation when exploring station country on a quad bike and it has always got me back to the homestead.
It is worth noting that if you are going to use this type of method for navigation that you also have should carry a small power bank and a means to charge it. We carry a small solar panel in our day pack.

Ozi Explorer
Ozi Explorer can operate on a variety of devices including Android, IOS and Windows PC.
Exploroz Traveller
Exploroz is a WA company that has been offering a smart device app for a few years now. Like all apps, it has its pros and cons and can be used on Android, IOS and Windows devices. It uses the EOTop map set and includes points of interest, street, road and track data as well as campsite information. The map data is managed by the parent company of Exploroz.
Most of the digital maps used strip much of the map data away so that you are only presented with what the developer believes is pertinent information. This is great for reducing screen clutter but does not help when you are trying to identify a re-entrant or how steep the terrain is going to get.
Topographic maps are a realistic representation of what is actually on the ground and are essential for any sort of remote area touring.
It doesn’t take much to have a primary and secondary source of information and in our case, we always carry a HEMA HX-2 navigator as our primary map solution. To back it up, in case of a device failure, we also have either a physical map or map book of the areas we are travelling in.
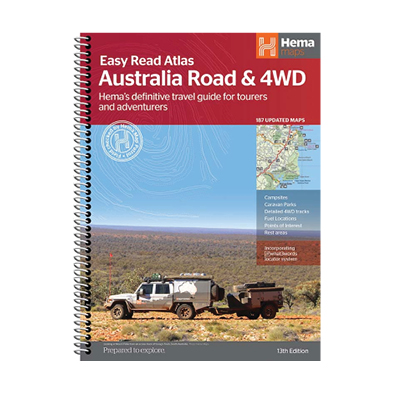
Map books
There is a wide range of 4WD atlases on the market. We default back to the range offered by HEMA due to their exceptional map accuracy and quality.
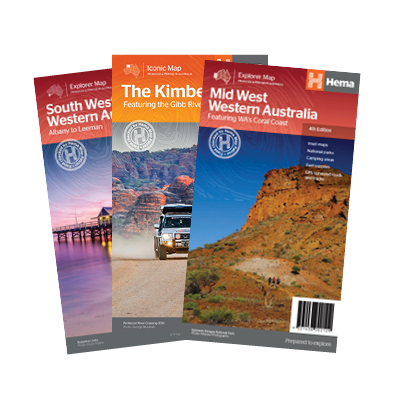
Flat Maps
Again, due to their quality and accuracy, the HEMA range of flat maps are a great option to have along for the ride. When folded out, they give you the complete picture of the area that you are in.