Cook like a Boss
Going out on your next adventure doesn’t mean that you have to live off 2 minute noodles or cans of baked beans. With a little thought and taking some basic ingredients with you can have you whipping up some amazing gastronomic delights in no time. Jo Clews, self proclaimed Camp Oven Queen and resident Western 4W Driver Culinary Cuisine Champion, shares some of her favourite recipes with us.

Investing in some good quality cookware will mean that you have it for a lifetime. Other than being used on a conduction cooktop, stainless steel and cast-iron products are extremely versatile and will most likely outlast you.
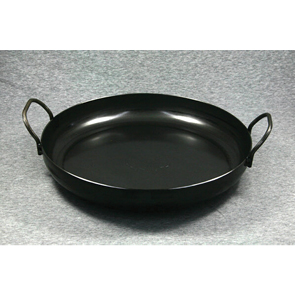
Large frypan
Having a good quality frypan that is at home either on a gas stove or cooking on the coals is invaluable for putting together a great meal.
We use and recommend the Australian made Hillbilly Loop Handle 330mm Frypan.

Small frypan
For smaller cook ups or wetter ingredients we also carry the Hillbilly Omelette Frypan. The folding handle makes is easy to store inside the larger frypan.

Camp Oven
There are plenty of choice out there for camp ovens. We have chosen the Hillbilly Bushranger Camp Kit, which comprises a large camp oven, extension ring, vegetable ring and some other accessories.
Cast iron camp oven
Having a good cast iron camp oven will round out your tool kit nicely, giving you added flexibility when cooking up a feat for your hungry crew.

BBQ beads or charcoal
Some think it is cheating but we think it just makes sense. Contrary to popular belief, you don’t need a lot of charcoal or heat beads (or coals from the fire) to cook a meal. A small pile underneath the camp oven (which is sitting on a trivet) and a single line around the outside edge of the oven’s lid is usually all it takes.
Butane Stove
These are cheap and the cylinders, although disposable, can be sourced from just about anywhere. With no bulky gas bottle to deal with they are ideal for setting up in a wide variety of locations.

Don't forget the gloves
Fire cooking, surprisingly, involves metal getting very hot. Having a good pair of heavy welding gloves is essential to prevent you from doing yourself some serious damage.
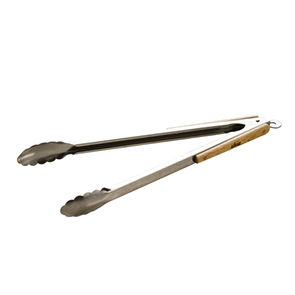
Long tongs
Heavy duty, the longer the better. Can be used not only for adjusting sizzling meat on the hot plate but also for repositioning wayward burning logs or to strategically place charcoal or heat beads.
Wire stand
Big enough to hold your camp oven, the stand should give you enough clearance to put some hot coals, charcoal or heat beads underneath the camp oven, without touching it.
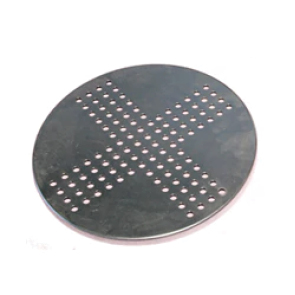
Trivets
If you want to burn everything in your camp oven to a cinder then place it directly on a pile of hot coals. If you want to be able to eat the food then use a trivet. Smaller trivets can be used inside the larger camp ovens as well to produce a much better cooking experience.
Enamel Plates
The cool thing about the old-school enamel plates is that not only do they make great plates (who would have thought) but they can also be used for cooking yummy meals in the camp oven … *mind blown*
Melamine is great but tend to sag a little after a stint in the camp oven. They also break after being dropped a few times.
Aluminium pizza trays
You can pick these up in a supermarkets or cash and carry. They are the perfect size for cooking some sausage rolls in the camp oven and being light-weight you won’t even know they have been stashed in the camp oven.
Small loaf tin
A couple of these can be handy for whipping up a bread or even a cake. There is nothing wrong with having some packet cake mix in the tucker box and putting together a nice chocolate cake for morning tea.

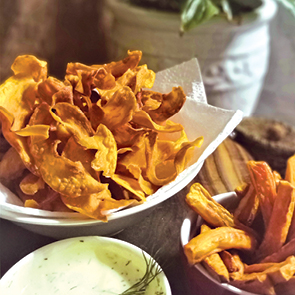
Sweet Potato Crisps
Sweet potato is a very versatile root vegetable and travels exceptionally well.

You will need
- 1 x medium size, roundish sweet potato (orange or white doesn’t matter)
- 500ml of frying oil (your choice of vegetable, sunflower or olive oil – just not engine oil)
- 1 x potato peeler
- 1 x small-medium cast iron camp oven or heavy duty deep dish fry pan
- Himalayan pink salt (not to be confused with Himalayan Chicken) or your preferred salt
- A heat source. Gas flame is preferred for this recipe as you can keep the heat consistent.
Method
- Peel the skin off the sweet potato and then continue peeling to produce very thin strips.
- Heat the oil in the camp oven or pan.
- Place 15-20 strips of sweet potato into the oil at a time.
Crisps are cooked when the oil stops bubbling and they float on the surface. - Once cooked, remove from the oil and place on paper towel to drain.
- Sprinkle with your favourite salt. Enjoy as they are or complement the dish with some mayo or dill.
Don’t be concerned if the crisps are a little flaccid when first removed from the oil. They will crisp up as they cool.
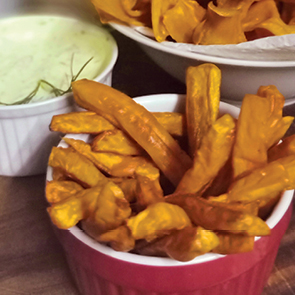
Sweet Potato Chips
Another yummy treat using sweet potato.
You will need
- 1 x medium size, roundish sweet potato (orange or white doesn’t matter)
- 500ml of frying oil (your choice of vegetable, sunflower or olive oil – just not engine oil)
- 1 x potato peeler
- 1 x small-medium cast iron camp oven or heavy duty deep dish fry pan
- Himalayan pink salt or your preferred salt
- A heat source. Gas flame is preferred for this recipe as you can keep the heat consistent.
Method
- Peel the skin off the sweet potato and then cut into chip like portions.
- Heat the oil in the camp oven or pan.
- Place 15-20 strips of sweet potato into the oil at a time.
Crisps are cooked when the oil stops bubbling and they float on the surface. - Once cooked, remove from the oil and place on paper towel to drain.
- Sprinkle with your favourite salt. Enjoy as they are or complement the dish with some mayo or dill.
Don’t be concerned if the chips are a little placid when first removed from the oil. They will crisp up as they cool.
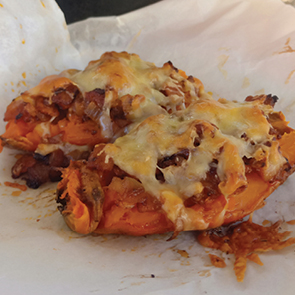
Smoky Bacon-topped Sweet Potato
Here is more evidence that bacon goes with everything.

Need to know
This recipe will take approximately 45 minutes to prep and cook. It serves two.
You will need
- 1 medium size, roundish sweet potato
- 2 rashers of bacon, finely chopped
- 1/2 an onion, finely chopped
- 1/2 cup of grated cheese
- 4 tablespoons of sour cream
- 2 tablespoons of fresh chives
- 4 teaspoons of your favourite smoky seasoning or rub
- 2 tablespoons of oil
Method
- Peel the sweet potato and place into a bowl.
- Pour over the oil, making sure to completely cover it.
- Sprinkle with two teaspoons of seasoning or rub.
- Place on baking paper lined baking dish and cook in hot camp oven for about 25 minutes.
- While the potato is cooking, prepare the bacon mixture by frying off the bacon and onion.
- Add the remaining rub or seasoning and cook until the onion is slightly caramelised.
- Once the potato is cooked through, remove from the camp oven and cut in half.
- Fluff up the centre with a fork and then evenly distribute the bacon topping over it.
- Sprinkle with cheese and then return into the hot camp oven.
- Remove from oven when the cheese has melted and turned a golden brown.
- Finish off with a couple of dollops of sour cream and sprinkle with chives.
Serve either on its own or as a side dish to some steak or salad.
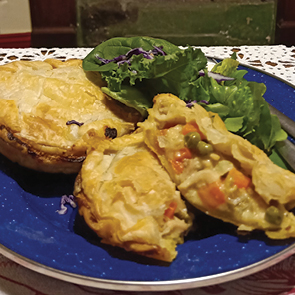
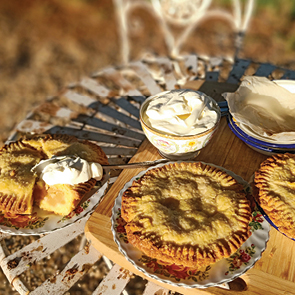
Hearty Chicken & Vegetable Pies
You would be extremely hard pressed to find anyone who doesn’t enjoy a good pie, especially a chicken pie.
Good to know
Makes 6 individual pies.
You will need (for the pie)
- 3 chicken thighs, chopped into small pieces
- 2 small carrots, finely diced
- 1 onion, finely diced
- 1 stick of celery, finely diced
- 1⁄2 cup frozen peas
- 2 tablespoons chicken stock powder
- 200ml carton of cream, UHT is good
- 1⁄4 cup water
- 2 tablespoons olive oil
- 2 tablespoons cornflour
- Salt and pepper to taste
- 1 1⁄2 sheets puff pastry cut into quarters
- 1 batch of hot water pastry
- 6 reusable or foil pie dishes lined with baking paper or heavily greased

Hot water pastry (the pie base)
- 1⁄2 cup of butter
- 1 1⁄4 cups of water
- 4 cups of plain flour
- 1.5 teaspoons of salt
Method
- In a medium size camp oven, deep frypan or pot heat up the olive oil and add the chicken, onion, carrot and celery. Fry off until onion is transparent, approximately 10-15 minutes.
- Add the water and chicken stock and cook for a further 10-15 minutes or until the carrot chunks are tender and most of the water has cooked away.
- Mix the cornflour with the cream and add to the chicken mix. Add salt and pepper to taste and only cook until the mixture has thickened. Add the peas and remove from the heat and allow to cool until cold.
- Prepare your pie dishes by either having a square of baking paper on the inside or heavily oil or grease to prevent sticking.
Making the pie base
- Bring butter, water and salt to the boil in a saucepan. Remove from the heat and add the flour, cut with a butter knife to combine, allow to rest until cool enough to handle.
- Divide the pastry into six even portions roll out a thinnish disc approx. 2-3mm thick and place into the pie dish, repeat with the remaining pastry, trim the edges and discard excess pastry.
- Evenly divide the cold filling between the pies, place one quarter of a sheet of puff pastry over the top then trim or as I do just fold the square edges over to round the top off.
- Brush the top of the pie with a little milk and poke a little hole for a steam vent.
- Place all six pies on a tray and cook in an oven of about 180°C for 25-35 minutes or until pastry on top is flaky and when pie is tipped out of the pie dish the pastry on the base is well cooked and golden.

The nuts and bolts
- If cooking in a camp oven then depending on the size of the camp oven a couple of batches may need to be done.
- Prepare your camp oven by heating it up to 180°C (we should all know how to do this by now) then put in 2, 3 or 4 pies at a time to cook.
- Make sure you have a little trivet in the bottom of your camp oven so the base of the pies do not overcook.
- Take a few hot, lumpy coals from the fire, or you can use bagged charcoal or heat beads and place on the ground away from your main fire.
- Put a sturdy rack over the top of the coals then place your camp oven on top.
- Put the lid on and arrange a ring of hot coals around the outer edge of the lid and cook for 25-35 minutes or until pastry on top is flaky and the bottom is golden brown.
- Check on their progress every 10-15 minutes as you may need to apply a new batch of coals to keep the temperature constant or take some away if things are cooking too quickly.
The hardest thing you will find with these pies is waiting long enough to eat them without scalding the roof of your mouth.

Clews' Clues
Tip. Any pie filling needs to be extremely thick so it doesn’t ooze out the pastry and deliver third degree burns to the consumer’s face when one bites into it.
Tip. Pie making is quite addictive and delicious so here are a few more of my favourite combinations – satay chicken, lamb and pea, cheese and vegetable, pepper steak, all of which can be found within the pages of the only camp oven cook book you will ever need.
Tip. A BBQ temperature gauge is how you tell how hot it is inside your camp oven. You can also use a piece of white paper. If after 5 minutes the paper is golden brown then the camp oven is ready. No colour or black/falling apart may indicate you need

Nachos
Quick and easy, surprise your mates with this golden, hot and cheesy classic.
You will need
- 1 bag of corn chips, your favourite flavour
- 1 400g can of kidney beans drained
and lightly mashed - 1 jar of salsa, your choice of heat
- 1 onion, finely chopped
- 1⁄2 red capsicum, finely chopped 1 cup of grated cheese
- 6 spring onions, finely sliced
- 2 tomatoes, finely diced
- 200g tub of sour cream
- 2 tablespoons oil
Method
- In a pan on the stove top heat oil and lightly fry 3⁄4 of the diced onion and 3⁄4 of the diced capsicum until onion is just slightly browned.
- Add the salsa and beans and cook for a further five minutes.
- Evenly divide the bag of corn chips between the two plates leaving a hole in the middle for the bean mix.
- Spoon bean mix in the centre and sprinkle the corn chips with cheese, place in a moderate oven for five to ten minutes. Take care to check as the corn chips burn easily if the oven is too hot.
- While cooking the nacho mix combine the rest of the onion, capsicum and tomato together in a bowl and mix together.
- Remove nacho plate from oven and spoon some of the tomato mix over the corn chips.
- Apply a generous helping of sour cream and finally garnish with spring onion.
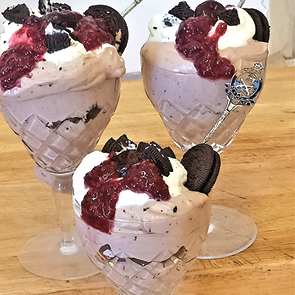
Chocolate Mousse
A great recipe that the kids can make while you are busy cooking dinner
What you will need
- 300ml cold whipping cream
- 4-5 large tablespoons Nutella or chocolate spread (must be at room temperature or blood temperature warm)
- 1 packet Oreo biscuits or similar or whatever you have in the tuckerbox
- 4 reusable acrylic stemmed glasses or glass dessert bowls if making at home
Adult version – 1⁄4 cup Baileys or cream based liquor
Method
- Pour cold cream into a large metal or glass mixing bowl and with a whisk, beat the daylights out of the cream until it forms soft peaks. You might need to pass the bowl around to a few people to get it done as your arm might get a bit worn out. Of course if you are at home and there is an electric beater then by all means use that.
- In a separate bowl roughly crush the biscuits.
- If making the adult version, mix the chocolate spread with the liquor in a separate bowl then with a large spoon transfer this mixture into the whipped cream and gently incorporate the two.
- Take your glasses and add two spoonfuls of the mousse mixture to the bottom of each then a spoonful of crushed biscuits and layer until all ingredients have been used.
- Place the mousse glasses into the fridge and allow to chill for a few hours.
Clews' Clues
Tip. Very cold Devondale UHT cream can be whipped if you don’t have fresh cream.
Tip. Most other biscuits can be substituted for the Oreos (eg. Tim Tams, Choc Mint or any other chocolate coated biscuits as well as plain Choc Ripple or Gingernuts).
Tip. Decorate with some extra whipped cream, grated chocolate and a cherry or some fresh berries like strawberries, blueberries or raspberries or even a spot or two of jam if you don’t have fresh fruit.
Tip. Instead of crushed biscuits, layers of fresh berries like raspberries and blueberries make a nice alternative.

Decadent Donuts
These. Donuts. Rock.
What you will need
- 2 cups self-raising flour
- 150ml pouring cream
- 150ml lemonade
- Generous sprinkle of cinnamon
- 1 cup caster sugar
- 2 tablespoons cinnamon
- 1 litre vegetable oil
- Small cast iron camp oven
- Clip lock lunch box
- Tongs
- Heat source, either gas or butane burner.
Method
- Place the cinnamon and sugar into the clip lock box, place the lid on and shake to mix.
- Pour oil into the camp oven and place over high heat for 10 minutes then reduce to low heat.
- Put the two cups of flour and cinnamon into a large mixing bowl. Make a well in the middle of the flour and pour in all the cream and most of the lemonade, combine the ingredients with a knife until a stiff dough is formed, you may not need all the liquid to achieve this.
- Flour your hands so the dough won’t stick and break off slightly larger than golf ball size pieces. Roll into a ball and flatten, make a hole in the middle with your thumb and stretch the dough out to make a circle of dough with a hole in the middle of about 4-5cm diameter.
- Gently lay the donut into the hot oil and cook for 2-3 minutes each side or until golden brown. Remove from the hot oil and drain on some paper towel then place a couple in the box with the sugar and gently rotate the box so the sugar evenly coats the donut.
- I normally sacrifice the first donut and cut it in half once I think it is cooked just to make sure after it is removed from the oil it has cooked all the way through then continue cooking in batches of 3-4 until all the dough is used up.
Clews' Clues
Tip. How to determine oil temperature? Drop a small piece of the dough into the hot oil and if it floats as soon as it hits the bottom of the pot the oil is ready. Be sure to keep the gas on low so the oil doesn’t get too hot and burn the donuts.
Tip. Long donuts can be made by turning the piece of dough into a log and cooking the same as above. These can be sliced through the middle and filled with jam and cream.
Tip. Donut balls can be made simply by breaking off a smaller than golf ball size piece of dough and rolling into a ball and cooking the same as above.
Tip. Jam (without any chunks or seeds) or Nutella can be forced into the centre of the donut ball by using an old squeezy sauce bottle filled with slightly warm filling and the nozzle gently pushed into the donut and squeezed until it just starts coming back out the hole.
Apple Cinnamon Pie
Can’t talk. Eating.
For the apple mixture
- 1 800gm can of pie apple,
- 1 teaspoon of cinnamon
- 2 tablespoons of sugar
For the pastry
- 1 cup of self raising flour
- 1 cup of plain flour
- 4 tablespoons of sugar
- 1 tablespoon of custard powder
- 2 heaped tablespoons of milk powder, optional
- 2 heaped tablespoons of butter or margarine
- 1 egg
- 1⁄4 cup of milk
Method
- Combine flours, sugar, custard powder and milk powder in a bowl, add butter and rub in with your fingers until all absorbed.
- Make a well in the middle of the flour mix, beat egg and milk together and pour into the well. Cut ingredients together with a butter knife and mix until all combined.
- Turn out onto a floured surface and gently knead a couple of times. Cut dough in half, roll out one half to line a 20-24cm pie dish.
- Line the pie dish with baking paper, lay in pastry and fill with apple mixture. Place second sheet of pastry over the top, trim edges and press together with a fork.
- Brush pastry top with milk or beaten egg and pierce a couple of holes in the middle. Place pie into a moderate camp oven on a low trivet with coals scraped to the edges of the lid. Cook for about 20 minutes, then check on its progress, scrape coals to the centre and cook for further 5-10 minutes or until golden brown.
- If cooking in a Weber or similar hooded BBQ, pre-heat to about 180°C, place a couple of layers of foil underneath the pie plate and cook for about 25-30 minutes. The top may not brown up as well in a camp oven as all the heat comes from underneath and be sure to check that the bottom of your pie does not burn.
Clews' Clues
Tip. Other fruit combinations can be substituted eg. apricot, apple and blueberry, apple and custard.
Tip. Pie can be cooked in a home oven at 180°C.
Tip. Ingredients can be divided into four portions and made into individual pies.
Tip. Any left over pastry can be rolled out flat and cut into shapes to make a lovely sweet biscuit to have with coffee.