YOUR GUIDE TO GETTING STARTED
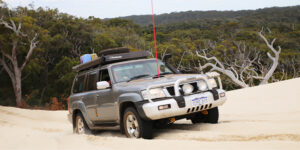
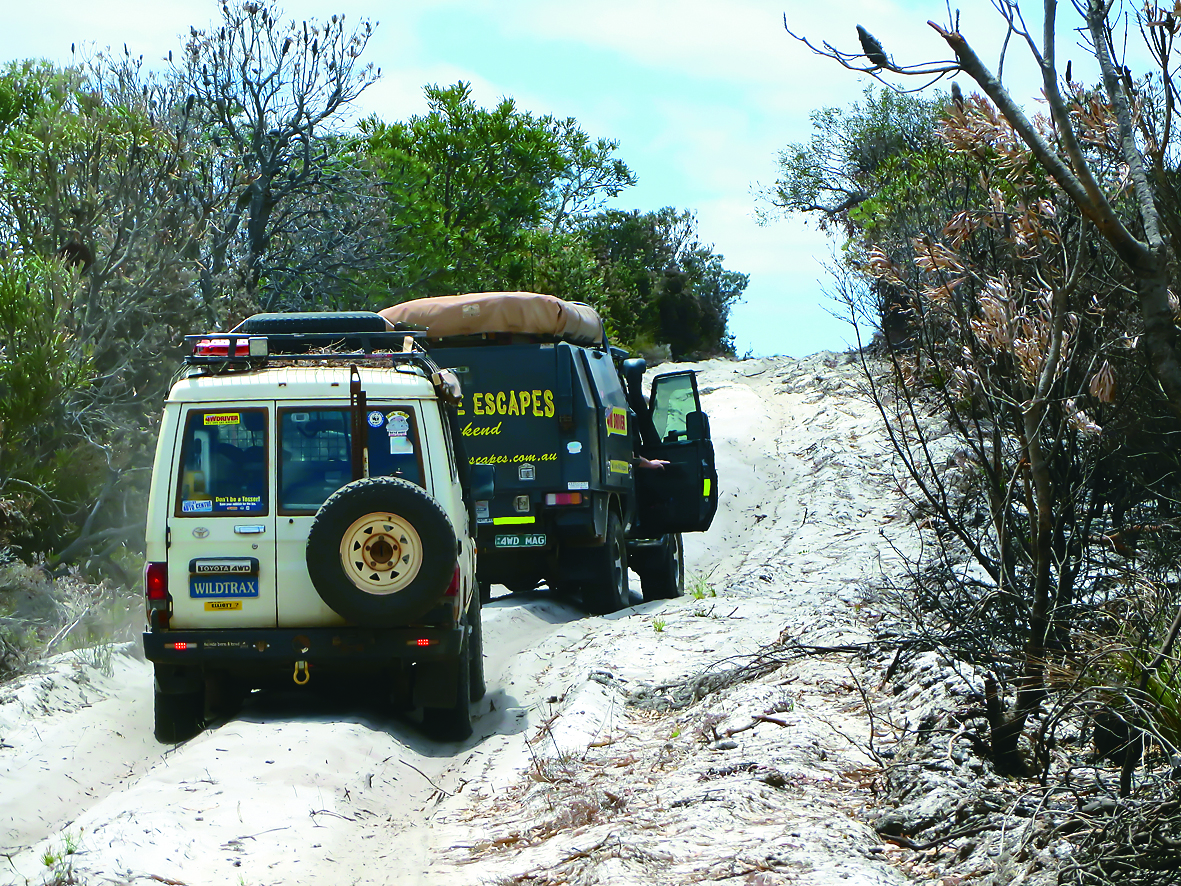
It can be a little daunting if you have never taken your 4WD off-road before. How do I use 4WD? Why do I need to know about tyre pressure? What do I do if I get bogged? Where can I go off-road? These are all valid questions. We are here to help you get the most out of your 4WD and get you out having amazing family adventures.

When we get started in a new hobby or pastime, it is only natural to get sucked into the hype and buy everything that iss recommend. We prefer to take a different approach. Slow down and understand how to operate your 4WD first before you start spending money on it. It’s also a good idea to ask yourself these questions:
- What sort of 4WD adventures are you planning? Weekend trips onto the beach, trips into the outback or extended touring.
- How often are you planning to get off-road?
- Are you going to go it alone, with friends or are you going to join a 4WD club?
- How long do you intend to keep this 4WD?
Knowing the answers to these simple questions is a great place to start.
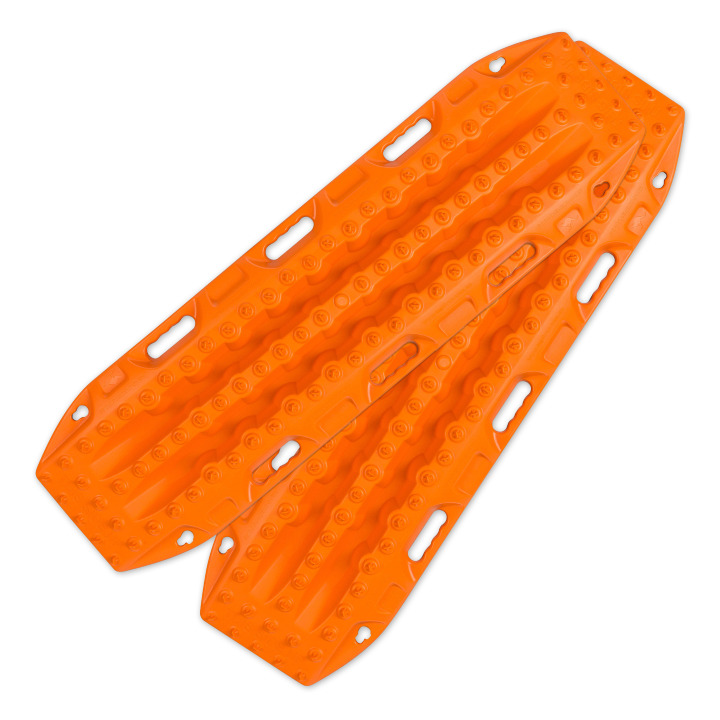
Recovery Tracks
These are a great investment. They are relatively cheap and extremely effective in getting your vehicle unstuck. We recommend staying away from the cheaper brands as they tend not to last very long.
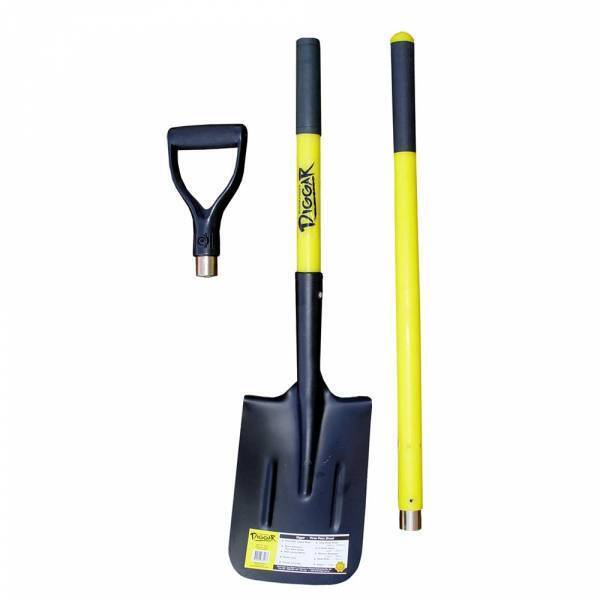
Shovel
When you get bogged you are going to have to dig. Worst case, carry a small, foldable shovel in your vehicle. If you can, a longer handle shovel is more effective for getting right underneath your car and clearing away sand or mud.

Tyre Deflators
Sand driving, heavy corrugations and even rocky surfaces will require you to reduce the pressure in your tyres. To be able to do this accurately you need to be carrying a tyre deflator. There are plenty of different ones on the market and we recommend getting one with a pressure gauge.

Air Compressor
If you let air out of your tyres then you need to be able to pump them back up. A 12 volt air compressor is essential equipment for going off-road. Something that connects directly to your battery is best (using alligator clips). Cheaper units will tend to burn out of you use them for long. Look for something with a longer hose or can have additional hoses added so that you can reach your camper trailer or caravan (if towing)
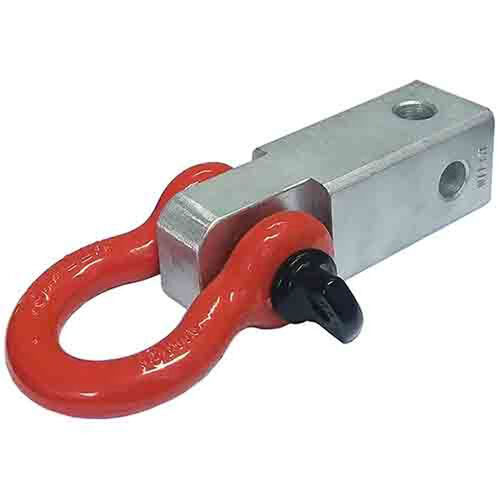
Recovery Points
It’s not a matter of IF but WHEN you get your vehicle bogged. Being able to extract it safely is imperative. Regardless of your experience level, you should equip your vehicle with RATED recovery points. It can be as simple as carrying a Reece Hitch block (like the one pictured) or having recovery points fitted to the chassis of your 4WD. NEVER use the tie-down hooks or your tow ball for a vehicle recovery.
Don't rely on Google Maps
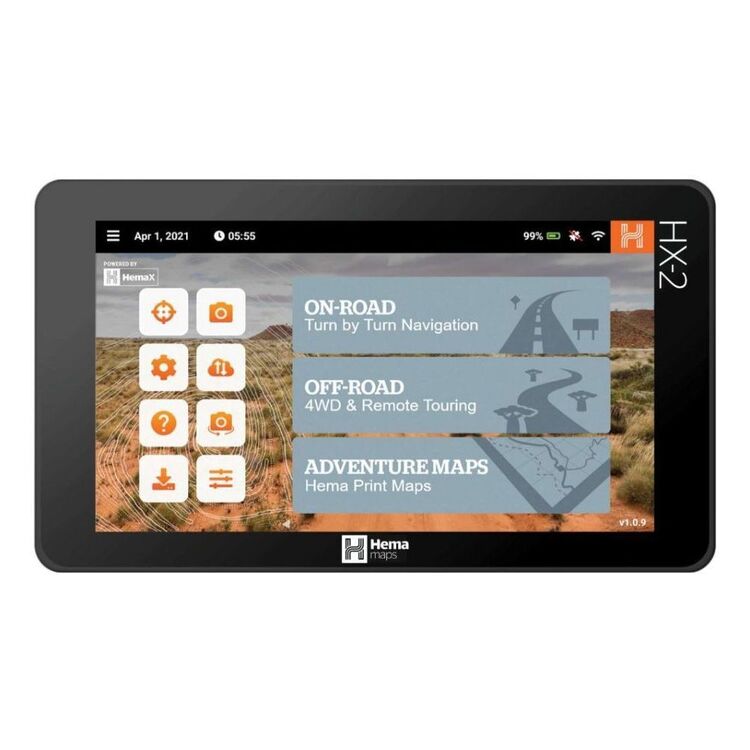
Heading off the bitumen also means that your ability to navigate will become more challenging. For all of the really worth-while locations you are more than likely to be out of mobile range or it is going to be patchy at best. Making sure you have a good quality GPS will give you the added confidence of not only getting you to your destination but getting you home again as well.
We use and recommend the Australian owned HEMA HX-2 Navigator.
Anytime you decide to head out and leave the bitumen, make sure you address the following:
- Where am I going and who have I told?
- Who is coming with me? Do I have enough water for everyone? Do we need to bring some food along?
- How can I call for help if something goes wrong? Do you have a UHF radio in the car? Is there mobile reception where you are going (it might be a different mobile phone carrier)? Do I have the recovery gear and experience to get myself out of trouble?
- What have I got with me if something does go wrong? Do you have a first aid kit? Are you carrying specific medication for everyone with you (ie Epipen, asthma puffer)?
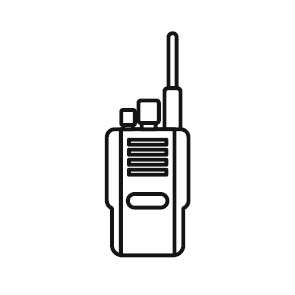
UHF Radio Channels
A UHF radio (or CB)fitted to your 4WD is a great addition that allows you to stay in touch with other vehicles you may be traveling with (a long as they also have a UHF radio) and to communicate with other road users.
For highway travel or to communicate with trucks (and escorting pilots), channel 40 is the standard.
Caravaners or those travelling in convoy tend to operate on channel 18 or another pre-determined channel.
It’s a good idea to agree with everyone you are travelling with on a primary channel and an alternate (in case there is too much traffic)
Download and print out this handy guide to all 80 UHF channels in use in Australia.
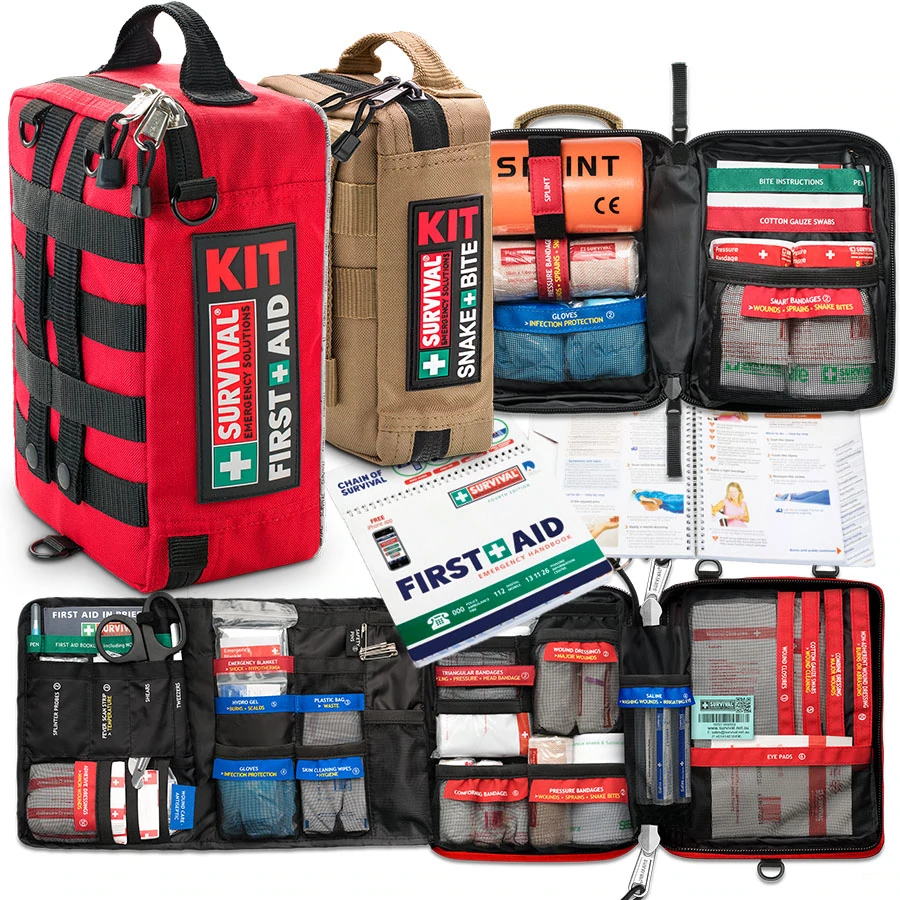
First Aid Kit
Ensuring you are carrying a first aid kit in your vehicle should be a given, but more so when going off-road. Carrying basic first-aid supplies gives you the tools to respond to minor mishaps as well as equipping you to start dealing with more serious injuries until professional help arrives.
Make sure that the first-aid kit you choose has bandages suitable for treating snake bite.
There is a wide range of inexpensive first-aid kits available on the market. The trick is making sure that it is well stocked and that you periodically check it’s contents.
We also recommend undergoing a basic first-aid course (if you haven’t already) for extra peace of mind.
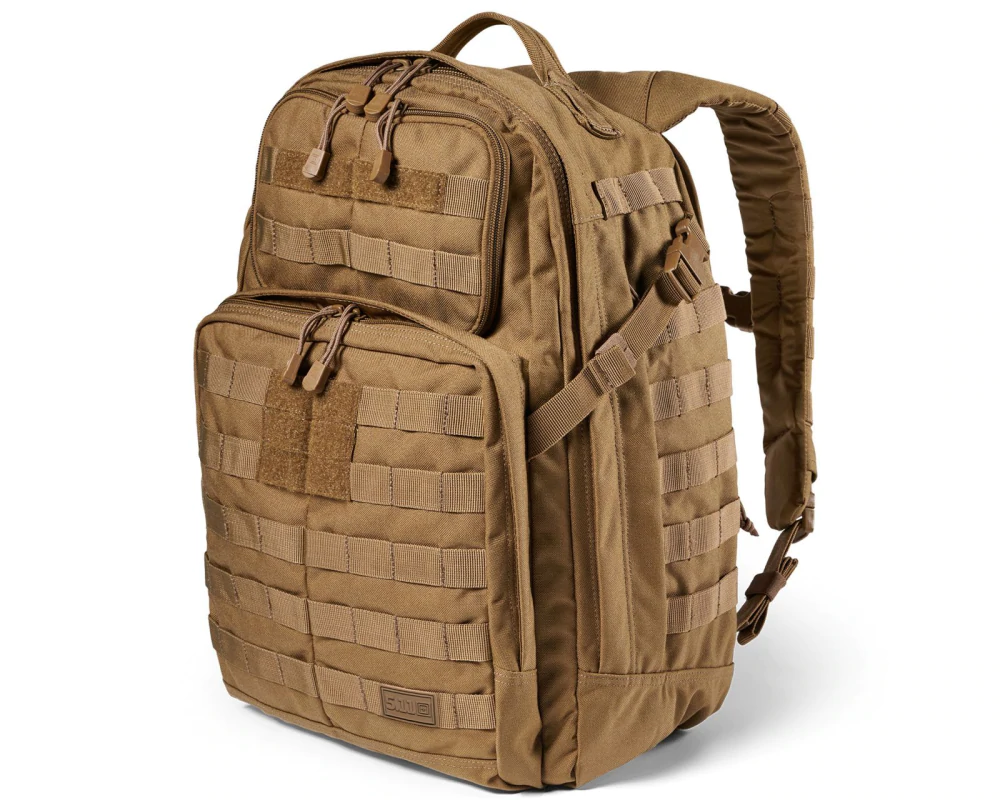
Day Pack
If you are planning on driving somewhere and then going for a walk, we recommend that everyone in your party has some sort of day pack (small backpack) to carry water and some other basics.
Some things to consider carrying:
- water (we carry between 2-4 litres per person)
- some snacks (ie protein bar, apple etc)
- Small first aid kit
- Survival kit
The key point here is water. Taking a small 600ml water bottle is not enough, even if you think you are going on a short walk. There are plenty of stories where people have ended up lost when going to look at something away from their vehicle.
As an example, we spoke to Anne after her 24 hour ordeal at Mt Augustus, in WA’s north. Her story highlights how quickly things can go wrong, even for someone as experienced as Anne.
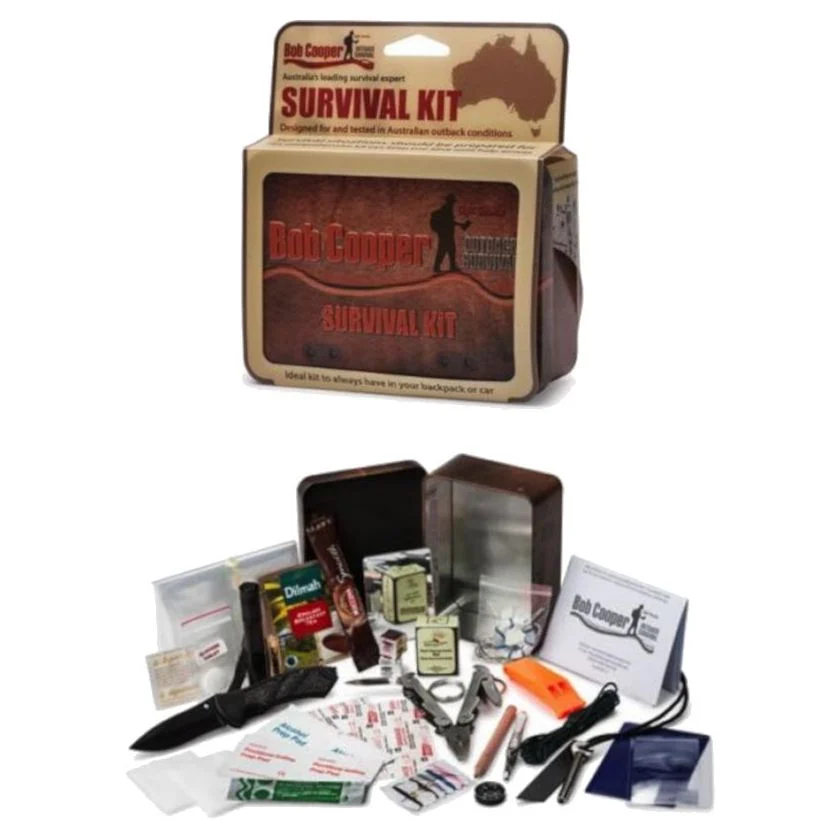
Survival Kit
If you follow the Scout’s motto of “Be Prepared” then there shouldn’t be many unforseen circumstances that you can’t deal with. Heading away from civilisation means that there is always a risk of becoming separated from your vehicle or breaking down in the middle of no-where. Our day packs include a small survival kit that packs away neatly into a small tin and equips us with the necessary items that may be the difference between life and death.
NB: We have also undertaken a basic survival course to understand how to best use the items in the kit. If you want to know more about survival courses then we suggest talking to the team at Bob Cooper Outback Survival.

Snake-bite kit
There is a high probability of stumbling across a snake at some point and we think it is a great idea to ensure that you are carrying a means of treating a snake bite. If your first aid kit doesn’t already have them, having 3 appropriately sized bandages is the most effective method for the initial treatment of a snake bite.
We carry these from Bob Cooper Outback Survival.
Breakdowns happen. You might damage multiple tyres and not have enough spares to get you back on the road. You might run out of fuel. Your battery might fail and you can’t start the car. You might have an engine fault that prevents you from driving. You might become so bogged that you need assistance to get out. For what ever reason, there is one simple rule that you should never break. STAY WITH THE VEHICLE.
Australia has plenty of stories of travellers breaking down and then who try and walk out for assistance. In a landscape where temperatures can exceed 50+, this rarely ends well. In a vast landscape, even if someone knows where to look, it is extremely difficult to spot someone walking. A vehicle, on the other hand, is larger, has reflective surfaces and is more easily spotted. Staying with your vehicle also provides you with a plethora of resources that you won’t find in nature.
If you have broken down and you are on your own, we recommend the following:
- Open the bonnet and leave it up. Even if it is not an engine issue, this is the universal sign of a break down. If someone drives past and sees your vehicle with its bonnet up, they are more inclined to stop to see if you need assistance.
- Check to see if you have any mobile reception. You will be surprised at some of the places we have managed to get phone reception when travelling remotely. Call or message someone of your predicament. You are using a smart phone, you can get your GPS location by using the built in map app and marking your location. This will generate your GPS co-ordinates that you can pass on.
- If you are carrying a satellite phone, use it. If you are equipped only with an EPIRB and you suspect you could be stuck for some time (ie you are very remote) then consider triggering the device.
- If there is shade nearby, move all occupants to it. The interior of the vehicle will get very warm, very quickly.
A quick note on water consumption. You should be carrying enough water for everyone in the vehicle and it is important to understand that when consuming water (regardless if you are broken down or just having a drink) that you should drink at least a cup full at a time. DO NOT SIP as a means of conserving your water. For the water to be any benefit to your body you need to consume, at minimum, a cup full. Sipping does not provide you enough water to be of any benefit.
Your vehicle is a source of resources that can be used if the situation becomes dire.
- Overnight dew on the windscreen can be scrapped off for additional water. It won’t be much at a time. Use a credit card or similar as a scrapper and a clean rag or cloth (or shirt) to collect it.
- Your windscreen washer bottle holds several litres of water. Use only clean, potable water when filling up the wiper bottle.
- If the engine still works, you can run the vehicle with the air conditioner on high. Place something under the vehicle where the condensation drips out from the air conditioner unit and collect the water.
- The rear view mirror (and even side mirrors) can be removed from the car and used as a signalling device.
- Your battery can be used to create a spark and light a fire (if you are not carrying matches, lighter or fire starter)
- The spare tyre can be removed from the vehicle, deflated and used to create a signal fire. Rubber burns with an oily black smoke, making is extremely easy to spot from a distance. You can siphon some fuel from the vehicle to ensure that it ignites and stays alight. Be careful to set any signal fire away from the vehicle. Clear flammable materials away so that you don’t start a bush fire.

Couple lost for days without food, water in remote South Australian outback
A recent example of how quickly things can go wrong. In this example, the couple left their vehicle as they attempted to walk out.
What they did right:
- They left a note at the vehicle telling anyone that found it their intentions.
- They marked the road as they travelled with SOS and direction of travel indicators.
- They left further notes in the middle of the road.
What they did wrong:
- They left their car.
The person that found them first found their car and said that he only travels that particular road every 6 weeks or so. They were still 25km+ from help and would most likely not have made it.
Read the article here

Major search for missing man
Another example of when everything goes wrong.
At the time of writing, a search was still underway looking for a missing man who had ridden off on a motorbike to get assistance after his vehicle became bogged. His female travelling companion was found by searchers, approximately 10km from the vehicle, after she went to look for him when he failed to return.
Authorities were alerted by concerned family members when they were unable to make contact with them.
What they did right:
- Told someone where they were and when they could be expected to make contact.
What they did wrong:
- Left the vehicle.
You can read the ABC article here
There is so many terms and acronyms about a 4WD that it can become quite overwhelming. Never fear, we have put together a glossary so that you can converse with even the most seasoned 4w driver.

ABS (Anti-lock Braking System)
A computer controlled system that was developed to increase a vehicle’s braking effectiveness in an emergency by minimising skidding.

All-Wheel Drive (AWD)
All-Wheel Drive is found on many popular vehicles. It provides power to all four wheels at the same time and provides an enhanced level of road holding and performance. It is NOT designed for off-road, 4WD use. Many AWD vehicles will have the ability to engage a central differential as well as being able to select both high and low range 4WD.
A vehicle operating in AWD must only loose traction on one wheel to stop.
All Terrain Tyres (A/T)
As the name suggests, all terrain tyres are designed for 4WD’s and can go just about anywhere. They are designed with a stronger sidewall, and a slightly aggressive, open tread pattern (when compared to highway terrain tyres) as well as a harder rubber compound. They are suitable for most surfaces, including rock, gravel, mud, sand, snow and bitumen.
They are designed for 60% on-road and 40% off-road use.

Automatic, free-wheeling hubs
An automatic system, designed for vehicles equipped with free-wheeling hubs to engage and disengage the hubs by using a clutch mechanism inside the hub. This clutch is activated when the driver selects 2WD or 4WD.

Approach Angle
The angle between the ground and the lowest point at the front of a vehicle where it might contact an object ahead.
Breakover or ramp Angle
The measure of how acute an angle the vehicle can cross with becoming hung up (stuck)

Differential
A differential is a gear train with three drive shafts that have the property that the rotational speed of one shaft is the average of the speeds of the others, or a fixed multiple of that average.
In simpler terms, it is designed to share power between two shafts.

Departure Angle
Opposite to the approach angle.

D-shackle
A device used to temporarily connected two objects such as chains or snatch strap to vehicle etc.
Four-wheel drive (4WD, 4x4 or Fourby)
At its simplest definition, a 4WD vehicle has a transmission system that provides power directly to all four wheels.
It may be full-time or on-demand and is typically linked via a transfer case, and in many instances, additional gear ranges (high and low range).
For a vehicle operating in 4WD, it must loose traction on two diagonally opposite wheels to be stopped.
Free-wheeling hubs
Not as nearly as common as it used be, free-wheeling hubs can be found on the front wheel of home part-time 4WD vehicles. They are used to engage the front half axle shaft from the hub of the front wheels. When not engaged the 4WD behaves the same as a conventional 2WD vehicle, with only the rear wheels being “driven”.
Quite often you still find free-wheeling hubs on the more popular Landcruiser Troop Carriers used by many 4WD hire companies.

Gross Vehicle Mass (GVM)
The maximum total weight that a vehicle can apply to the ground. This includes the vehicle, passengers, fuel and fluids, cargo and weight applied to the tow hitch.

Gross Combination Mass (GCM)
The maximum mass of a vehicle and is a combination of both the vehicle’s GVM and the weight of any trailer or caravan being towed. This is set by the vehicle’s manufacturer and in Western Australia cannot be altered.
Ground Clearance
Usually measured in millimetres, it is the distance from the ground to the lowest point (excluding the tyres, wheels, hubs or mudflaps) of the vehicle

Highway Terrain Tyres (H/T)
All 4WD’s are supplied by the manufacturer equipped with HT tyres. As the name suggests, they are designed for bitumen use only and are not suitable for off-road use.

Mud Terrain Tyres (M/T or "Muddies")
Mud terrain tyres are built with an extremely aggressive tread pattern, designed to prevent mud and debris build up around the tread patters. They are made with a much softer rubber compound than AT’s and are designed for extreme off-road conditions.

Original Equipment Manufacture (OEM)
Equipment on a vehicle as supplied by the manufacturer.

Reece Hitch
The box receiver, part of your tow bar, that provides a slot to insert a tow-ball tongue. The reece hitch can also be used with a removable recovery point by replacing the tow-ball tongue.
Solid axle
Both wheels are connected via the axle. The movement of one wheel directly effects the other.
Suspension
All of the components used to suspend and control a vehicles chassis, frame, body, engine and drive train above the wheels.

Soft-roader
This is the term used to group vehicles that do not have:
- low range
- adequate ground clearance
- little or no underbody protection
- passenger car tyres
- light suspension
Transfer case
Part of the drive-train of any 4WD or AWD, the transfer case delivers power from the transmission to the front and rear axles by means of drive shafts. it also synchronises the difference between rotation of the front and rear wheels and may also contain one or more sets of lows range gears for off-road use.

Sidewall
This is the portion of tyre between the tread and the bead. Tyre information is printed on the sidewall.

Torque
The term used to describe the turning or twisting force delivered by a vehicle’s engine to its wheels. Torque is expressed in Newton metres (Nm)
Traction control
Used with ABS, the system is designed to minimise wheel spin (or slippage) and loss of traction by using sensors at the wheels.
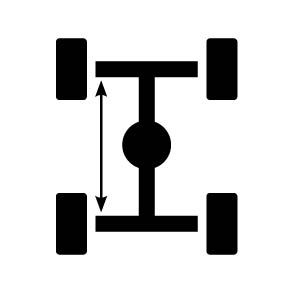
Wheelbase
The distance between the front and rear axles.
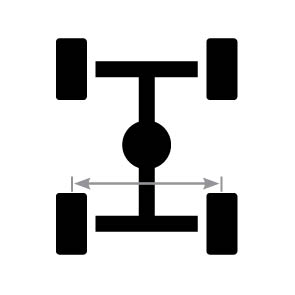
Wheel Track
The distance between the centre of the tyres on the same axle, not the width of the vehicle.
If you have grabbed the basics and you are wanting to venture further afield or try some more challenging locations, then you should probably think about the following:
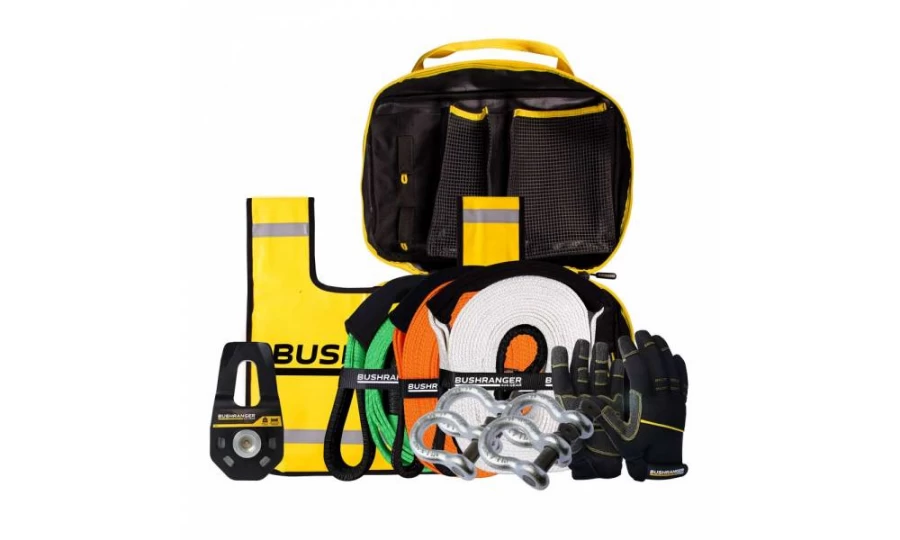
Advanced Recovery gear
Snatch straps, shackles and dampeners are all required to extract a vehicle that cannot be recovered using recovery boards and digging. Buy reputable brands ensure you look after them. If they get a bit of use then replace them after after every 8-10 uses.
We recommend getting some professional training on how to use this type of equipment correctly as it can be extremely dangerous.

Bullbar
A bullbar is an essential piece of equipment if you intend to travel far. It provides your vehicle with a level of protection against animal impact. It also allows easy fitment of driving lights (spot lights) and antennae for UHF radios and mobile phone boosters.
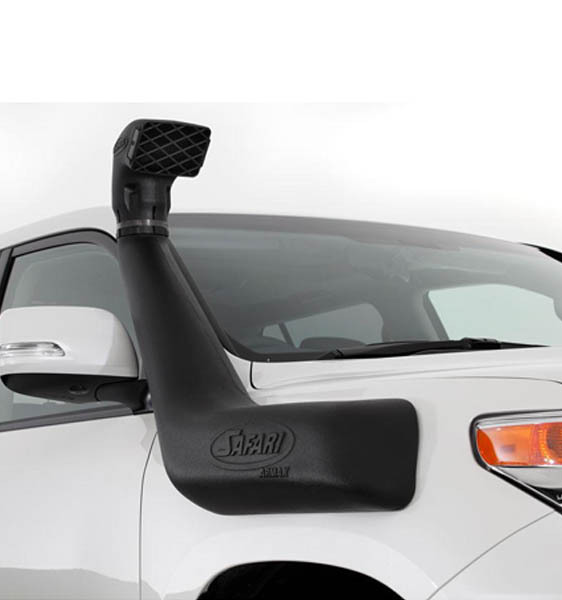
Snorkel
A snorkel extends the air intake of your vehicle (usually located in the front wheel arch) up to the height of the roof. We do not recommend then attempting a water crossing that deep but it does provide for less dust and slightly cooler air (due to improved air flow and greater distance from hot bitumen)
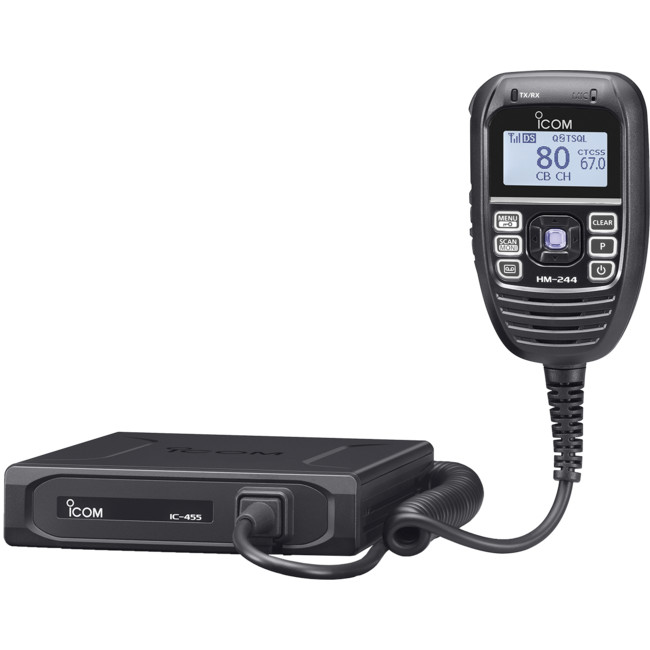
UHF Radio
Fitting a UHF radio to your vehicle gives you the ability to communicate easily with other road users and other vehicles travelling with you. Vehicle mounts units use larger antennae, giving them a greater range than hand-held units. Many new models place all of the controls in the handset, allowing for discrete installation.

All Terrain Tyres
The standard tyres that are fitted to your vehicle by the manufacturer are classed as highway terrain. If you want to use your vehicle off-road, it is recommended that you change these to all terrain tyres. These have a stronger sidewall, harder rubber compound and more aggressive and open tread designed not to hold dirt and debris within it. They are also designed to expel moisture more efficiently away from the tread when travelling off-road.
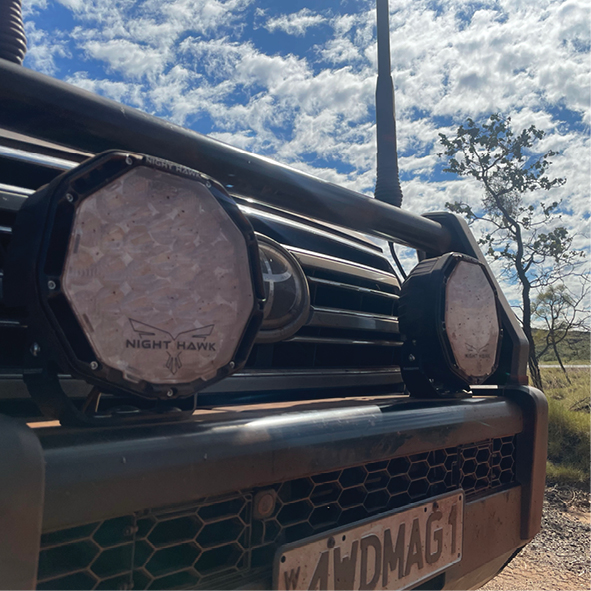
Driving Lights
The standard lights on modern vehicles are more than adequate for urban driving however they are lacking when you enter more rural areas.
Driving lights giving you much greater vision over a longer distance. They give you time to react when stock or wildlife decide it’s a good time to step (or hop) out onto the road and assists with reducing driver fatigue (by not having to strain your eyes with bad light)
There are plenty of options to suit your style and budget. They fall into two main categories: spotlights and light bars.
Spotlights
Generally these are round and can come in several different sizes. They can use a halogen globe (quite a yellow light and use considerable power), HID (which uses a different reflector to halogen and can take time to get to full brightness) and LED (instant brightness and a brilliant white light).
Light Bars
Light bars are a relative new-comer to the 4WD scene and again come in various sizes. They are powered by LED and tend to throw more of a spread pattern (versus a spot pattern)
When deciding on what lights to fit to your 4WD, consider:
- How much night driving you are intending to do
- How far you want to see up the road (do you really need to see 2km in front of you?)
- How much power these lights will consume when running
- Ensure that you get them fitted by a professional (if the wrong cabling or fuses are used then you can set fire to your car)
- Placement of your lights
There is always that desire to “cut loose” when you get off the bitumen, to really show everyone how well you can drive and to demonstrate the capabilities of your vehicle. If that is your intention, please DON’T. How you behave has a direct impact on every other 4WD owner and their potential ability to take their vehicles off-road.
Track Care WA have put together a great little brochure titled The Code Off-Road. It’s worth taking a look at.

Obey the laws and regulations for recreational vehicles that apply to public land.
Do not drive where not permitted or disobey offical signs. Research the area before you go.
More information on Off-road Vehicles is available here. To confirm use of a vehicle off-road in a particular area, refer to that area’s local government website.

Respect the cultural, heritage and environmental values of public/private land, by obeying restrictions that may apply.
Most of our land is either National Parks, private land, mining leases or indigenous owned. To help these parties manage volume and maintain their access paths, it’s important we notify them, or get permission, to travel through their land. There is no single website that currently facilitate this however using the following resources may assist you:
- Booking campsites within National Parks in WA.
- Map of Pastoral Leases in Western Australia. There is currently no register of contact details for each station, however knowing the name of the property you are considering travelling onto will assist in contacting them.
- National Parks Passes

Respect our flora and fauna. Stop and look but never disturb.
Take only photographs, leave only footprints/wheel tracks, and only in the right place.
Keep to formed tracks
Only drive on established tracks and in conditions that will not damage them.

Keep the environment clean. Carry your own, and any other, rubbish out.
Try and take out more rubbish than you bring in so that you leave the area better than when you found it.
Keep your vehicle mechanically sound and clean to reduce the environmental impact.
Ensure that your vehicle does not have oil leaks, is excessively loud and is road worthy. Removing mud and dirt can prevent the transmission of disease (such as Dieback).
Adopt minimal impact driving and camping techniques.
This includes avoiding driving on tracks where by doing so you will cause damage or be required to make new tracks to get around obstacles. Use existing fire pits (or bringing your own), not using generators, only collecting firewood from approved locations (or bringing your own with you) and not taking up more room that you need.

Seek permission before accessing private property. Do not disturb livestock or interfere with watering points and leave gates as you find them.
Leave gates as you find them and never leave a gate open longer than it takes for your vehicle(s) to pass through. Do not camp within 400m of water points. Do not wash or bathe in troughs or water tanks.

Take adequate water, food, fuel, basic spares and a first-aid kit on trips. In remote areas, travel with another vehicle and have Royal Flying Doctor Service or equivalent radio contact.
Be prepared. It is better to be safe than sorry. In the event of an emergency you will be more likely able to respond appropriately.

Enjoy yourself but be respectful of the rights of others.
Be mindful of how your actions will effect others in the vicinity and act appropriately.

Plan ahead and lodge your trip details with a responsible person or local authorities.
Ensure that you have an agreed upon ETA and it is clear what that person is to do if you fail to make contact.

Why and how to deflate a tyre
The 3 key elements to sand driving are:
- Tyre pressure
- Momentum / gear selection
- Floatation
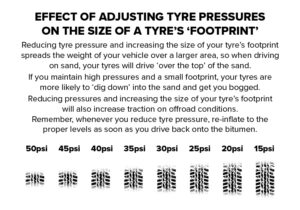
Here is a great way to understand the effects of tyre pressure and tyre footprint.
Know your vehicle
It’s important to understand that when driving on soft sand you will need to reduce your tyre pressures in order to assist in spreading the weight of the vehicle and help in accomplishing the all important floatation required. Reducing tyre pressures increases the length of the tyres footprint on the sand creating a similar effect to a caterpillar track. Reducing your tyre pressures also leaves less damage to tracks and the environment. “What tyre pressure should I be running at”? That’s a difficult one, as there are so many variables such as:
- weight of your vehicle (including cargo and passengers
- condition of the sand (how boggy it is)
- time of day and temperature (the warmer it is the drier and softer the sand)
Low Pressure = Low Speed
As a starting point we recommend reducing your tyre pressures on soft sand to about half that you would be running on the bitumen (i.e. 36 psi on the road, drop pressure to 18 psi on the sand). This is a starting point and you may find dependent upon conditions and vehicle mass you could need to go even lower. Be aware that you are now operating outside manufacturers’ specifications. The most important point to remember is:
LOW PRESSURE = LOW SPEED.
- Avoid sharp turns
- Avoid high speed
- Avoid getting airborne

How to deflate your tyres
The best method to deflate your tyres is by using a tyre deflator. It works by attaching to the valve stem and removing the inner valve so that air can be quickly released. The deflator controls the flow of air out of the tyre before placing the valve back into position.
- Remove the value cap
- Screw on the tyre deflator onto the valve stem(do not over-tighten but ensure it is threaded on correctly)
- Gently push and turn the end rod counter clock wise. You will feel it grab the valve core. Continue to turn counter clock wise until the valve core has been removed. The end rod will pop out under the air pressure.
- Gently pull back on the collar of the deflator. You will hear the air rush out.
- Push the collar back to the closed position every 5-10 seconds and check the tyre pressure.
- Once you have reached the required pressure follow the process in reverse.
- Ensure the collar is in the closed position.
- Gently push the rod towards the valve and turn clock wise.
- You will feel the valve core engage with the inner thread.
- Keep gently turn the valve rod until the valve core is firm (do not over tighten)
- Unscrew the tyre deflator from the valve, listening for air leaks as you do.
- Replace the valve cover
Repeat until all of the tyres (don’t forget your camper or caravan if you are towing) have been deflated.
How do I inflate my tyres?
Unless you are Superman, you are going to need a 12 volt compressor to pump your tyres back up after you have had some fun in the sand. We recommend getting a good quality unit, preferably one that has alligator clips that connects directly to the vehicle’s battery and an inline pressure gauge. Drive to a clear, flat spot and ensure (if possible) you are not blocking the way for other vehicles.
Connect
Connect your compressor to the battery (you will need to leave the car running for this otherwise you risk flattening the battery) making sure you get the POSITIVE (RED) and NEGATIVE (BLACK) clips attached to the corresponding battery terminals.
Remove
Remove the valve cover (keep it safe as it stop debris getting into the tyre valve)
Attach
Attach the air compressor hose to the valve.
Start
Start the compressor and start pumping up the tyre.
Check
Check the tyre pressure regularly with either the built in gauge or by using a stand-alone tyre gauge
Turn Off
Once you have reached the correct pressure turn off the compressor.
Disconnect
Remove the compressor hose and replace the valve cap.
Repeat
Repeat the process for all of the remaining tyres (don’t forget tyres on anything you are towing)
How do I tackle driving on different types of terrain?
Unlike driving on bitumen, the terrain can change very quickly when travelling off-road. Western 4W Driver highly recommends undertaking a 4WD training course by a reputable trainer. Look for a course that offers smaller groups so that you have time to understand and practice the concepts taught.
Always consider the safety and comfort of your passengers when tackling rough terrain.
Sand / Beach
- When beach driving, know what the tides are doing and know when high and low tide are.
- Keep a careful watch for extra soft patches of sand or where there may be a large amount of seaweed underneath the sand.
- Watch for wave eroded sections of beach that may collapse under your vehicle.
- Fresh water streamlets can create deep vertical gullies.
- Be observant for items washed up onto the beach.
- Take particular care when driving on dunes as they can have sudden drop-offs or hide tyre damaging limestone outcrops.
- Negotiate coastal tracks with care and be aware that you may have to shovel wind-blown sand drifts off tracks to prevent driving at an extreme angle.
- Take care when driving over rocky sections as they can be razor sharp and do irreparable damage to tyres.
Gravel / Corrugations
- Ensure you engage 4WD (in an AWD engage the centre DIFF lock. Most Utes are 2WD until you engage 4H) to ensure the best possible road handling.
- Reduce your speed to suit the road conditions.
- Be aware that wash-aways (sections of road scoured out or damaged by fast moving water) can “jump up” out of no-where.
- Where corrugations are prevalent, reduce tyre pressure (across both tow vehicle and trailer/caravan. A simple way to check if your tyre pressure/speed is correct is to stop and feel the body of each shock absorber. If they are too hot to touch then your tyre pressure is too high and/or you are driving too fast.
- Allow extra time for braking.
- Stay vigilant of wandering stock and native animals.

General tips
- Always assume that a track is carrying two-way traffic and drive accordingly.
- If in doubt, turn around and find another route.
- Keep a safe distance between vehicles.
- Only one vehicle to tackle an obstacle at a time.
- Use UHF radios to communicate between vehicles if you are travelling in a convoy. Nominate a trip leader and someone to be “tail-end Charlie”.
If unsure of track conditions, STOP and WALK the section of track BEFORE driving through.
What do I do if my vehicle gets bogged?
If you take your vehicle off-road you will get bogged. It is not the end of the world and ensuring that you have some basic equipment with you and a little bit of knowledge will get you moving again. When it becomes obvious you are stuck, stop spinning your wheels as this will just make it worse. Stop and assess the situation.
When you have assessed the situation, put a plan together and get started.
- Tyre pressure
- 4WD (high/low) activated (if you are in an AWD make sure the centre diff is locked)
- Clear sand/mud away
- Use recovery boards
- Use a snatch strap and another vehicle (only if you or the other driver knows what they are doing and both vehicles have RATED recovery points)
- Try winching out (if available) ensuring everyone not involved is well out of the way.
- Call for a 4WD recovery.

Is there any immediate danger to yourself, your occupants or the vehicle?
Ensure that there is no immediate risk. This may involve moving occupants out of the vehicle and to a safe location away from the recovery. You may need to position someone on the high ground if you are stuck in a gully, to warn other vehicles.
Have you let your tyres down enough for the conditions and the load in your vehicle?
Sometimes an extra couple of PSI can be all the difference. The chances of rolling the tyre off the rim are low, as long as you keep your speed down, avoid wheel spin and sudden changes of direction.
Are you in 4WD? (remember an All Wheel Drive is NOT 4WD)
Remember All wheel drive is NOT 4WD.
Are you in LOW RANGE 4WD?
If you are in HIGH RANGE, you may need to switch to LOW RANGE

What equipment do you have available to start the recovery?
Unless there are other circumstances at play, your recovery methods should be:
- Low range
- Tyre pressure
- Dig / Recovery boards
- Kinetic recovery (winch or snatch strap)
How do I change a tyre off-road?
If you are out on an off-road adventure somewhere, you need to ensure that you are as self-sufficient as possible. At some point you will have to change a tyre and having the right tools at hand will make all the difference when the time comes. Before you head out, ensure that:
- Your spare(s) are serviceable and road-worthy. It is also worth checking the date not them. If they are over 7 years old then tyre shops will not repair them.
- You have a jack suitable for your vehicle.
- Tyre iron / wheel nut wrench and correct size socket(s) to suit your wheel nuts. Remember that your trailer or caravan may be a different size.
- Vehicle owner’s manual.
We also suggest carrying:
- A rubber mallet, in case the wheel nuts are too tight.
- A torch or headlamp so that you can work in the dark.
We also carry an after market tyre iron that has an extendable handle. The longer handle provides more leverage and is usually enough to loose even the tightest wheel nuts.
Before you begin:
- Pull over in safe location, on a level surface, away from the flow of any traffic.
- Ensure that the vehicle is in PARK and the handbrake is applied.
- Turn on your hazard lights.
- If you have wheel wedges or something else to chock the wheels do so.
Loosen each wheel nut
You will most likely need to apply a bit of force to do so. Loosen about 1/2 a turn.
Jack the vehicle up
Ensure that no part of your body is under the car when doing so. Refer to your owner’s manual to identify the correct jacking locations on your vehicle. Raise your vehicle so it is high enough to remove the wheel.
Remove the wheel nuts and take off the wheel
Be aware that the wheel will be heavy. Lay it down flat to prevent it rolling away.
Line up the wheel studs with the new wheel
Gently push (it may need some wiggling)onto the wheel studs until they protrude through the holes in the rim. Put all of the wheel nuts back on using just your hand until they are hand tight. Using your tyre iron, continue to tighten each nut in turn until you can no longer twist them with your force.
Lower the vehicle down on the jack
Ensuring no part of your body is under the vehicle, lower the vehicle down on the jack. Check the tightness of each nut again using the tyre iron. Retrieve your jack and stow it back in the vehicle. Put your flat tyre in the vehicle (or on the spare wheel carrier if you have one)
Fix that flat ASAP
Ensure you get your flat/damaged tyre repaired or replaced as soon as possible.
Prior preparation prevents … well you know how that saying goes and it’s true. Spending some time thinking about the adventure you are about to undertake and planning it out can make all the difference between having an awesome holiday and arguing with your nearest and dearest.

Where are you going?
It might sound obvious but it is the first question you need to ask yourself. Not only that but if there are multiple ways to get there then which one are you taking and how are you coming back home again?

Why are you going?
Again, stating the obvious. Are you going fishing, hiking, chasing some waves or looking for gold? It could be as simple as looking for a nice shady spot near an amazing waterhole to pull up for a spell. What ever the reason, as long as it is clear because it becomes important further down.
What do you want to see, do, experience?
Are there particular locations or attractions you want to see or experience? How long do you intend spending at each spot?

Who is coming with you?
Is this a family holiday or a trip with mates? How many are joining you and how many vehicles are going to be in the convoy? If there is a large group travelling together then its also a good idea to have an idea of individual skill sets. Is anyone a nurse, who is mechanically minded, who can wow the crowd around the camp fire playing the spoons?

How long are you going for?
You will struggle to carry all the food, fuel and water you may need for an extended adventure without blowing your GVM/GCM. Planning to carry what you need and identify where you can refuel/resupply is a better way.
Who has what?
Watch your weight. No, I am not worried about that donut you might be eying off but more interested in how much gear you might think you need to take. If there are multiple vehicles going this is a great opportunity to share. There is no point in taking 4 chainsaws, 6 workshop level tool kits and 8 gazebos unless you actually need all that stuff. Work out what you need as a group and allocate.

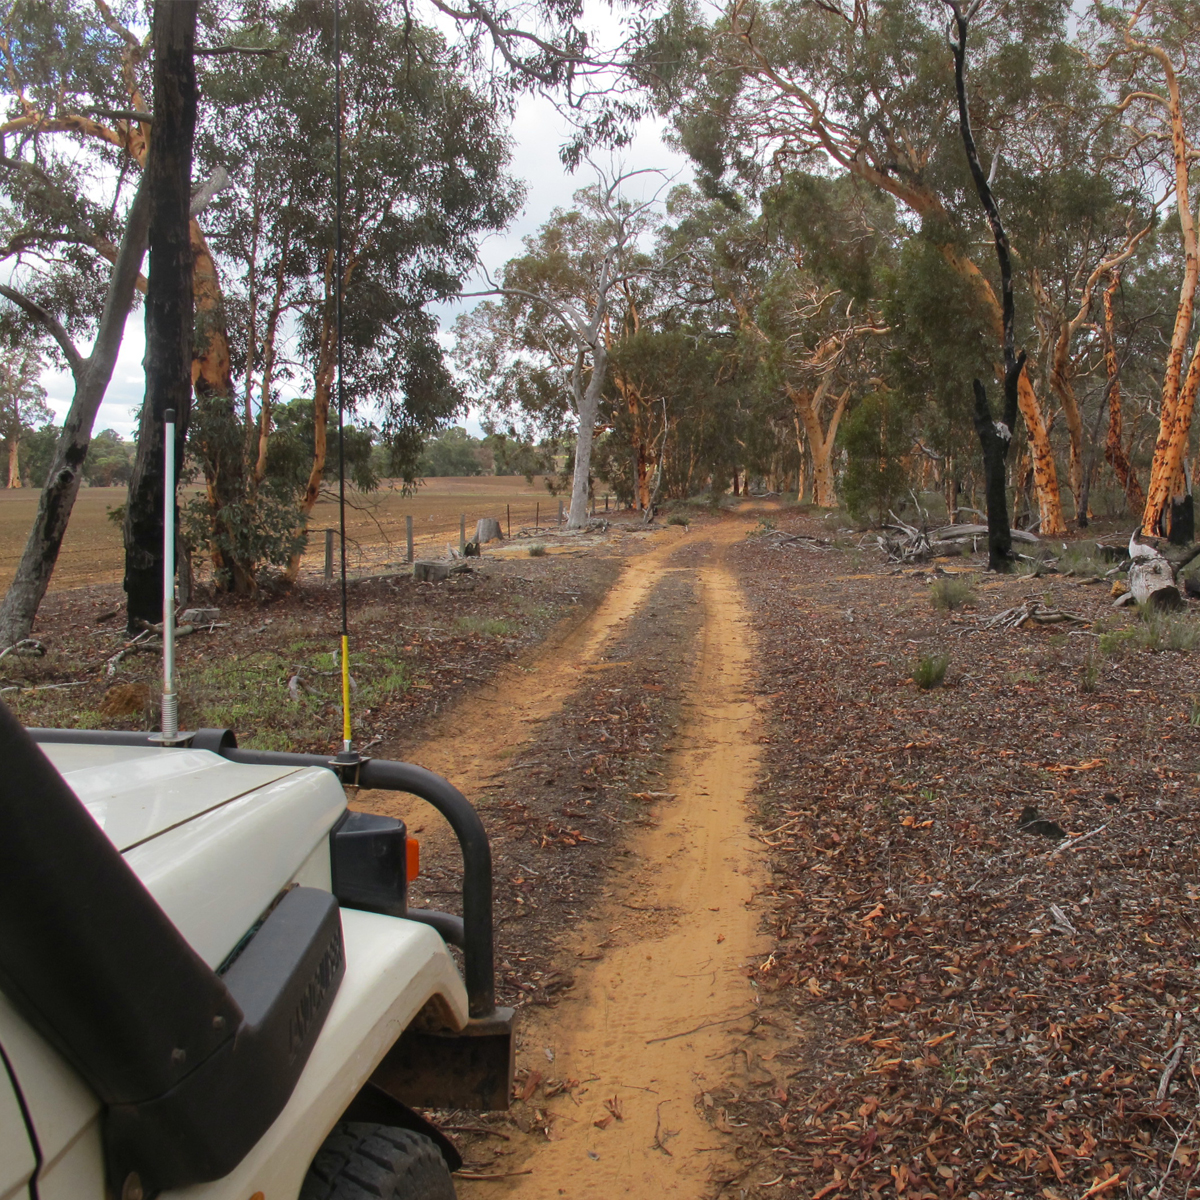
Dirt and gravel roads can be extremely dangerous if not given then appropriate amount of respect. Road conditions can change in an instant, requiring you to take a little more time when driving them. There are some simple things you can do to make travelling on them that much safer.
Tyre pressure
With a more “dynamic” surface, traction can be significantly less than when driving on bitumen. Dropping your tyre pressure by even 20% will increase the tyre’s contact with the road, allow it to absorb more of the road’s irregularities and make for a more comfortable ride. If you lower tyre pressures then you also need to reduce your speed as well.
If the road has a hard surface and is well graded then you will not likely need to reduce tyre pressure.
It is also worth investing in a set of good quality all terrain tyres if you are planning on leaving the bitumen.

Washer bottle
Make sure that the washer bottle is full before heading off on a trip and that you top it up regularly. When things get really dusty you are going to need it.
Engage 4WD
If you are driving something like a Toyota Landcruiser that has full-time AWD, you are NOT in 4WD. Most dual cab Utes are driven in 2WD until 4WD is selected. Engage 4WD (or lock the centre diff on something like a Landcruiser). This will give you much greater road handling and reduce the risk of loosing control on gravel roads.
DON’T FORGET TO TURN OFF 4WD BEFORE YOU GET BACK ONTO THE BITUMEN.
Two hands on the steering wheel
Two hands are better than one. You need to be able to react to conditions that can change quickly.
Vary your speed
Changing road conditions will require you to vary your speed. Unlike bitumen, where you can drive at the maximum speed limit posted, gravel roads will catch the unwary (and those that drive too fast). Avoid using cruise control on gravel for that same reason.
Braking
Try to only use your brakes when the front wheels are straight, before you go into a bend. If you have to brake hard then ensure you keep your wheel straight. It is better to hit that kangaroo that just jumped out in front of you (this is where the argument between a cheap and expensive bulbar is settled) straight on than to swerve erratically, and potentially roll the car.
The two main types of sand driving is beach and sand dunes. Regardless of the type of sand driving, the characteristics are the same.
- When beach driving, know what the tides are doing and know when high and low tide are.
- Keep a careful watch for extra soft patches of sand or where there may be a large amount of seaweed underneath the sand.
- Watch for wave eroded sections of beach that may collapse under your vehicle.
- Fresh water streamlets can create deep vertical gullies.
- Be observant for items washed up onto the beach.
- Take particular care when driving on dunes as they can have sudden drop-offs or hide tyre damaging limestone outcrops.
- Negotiate coastal tracks with care and be aware that you may have to shovel wind-blown sand drifts off tracks to prevent driving at an extreme angle.
- Take care when driving over rocky sections as they can be razor sharp and do irreparable damage to tyres.
Tyre pressure and selection
Having the right tyres (all terrain instead of highway or mud terrain tyres) and the correct tyre pressure is the difference between floating over the sand or bogging down.
Engage 4WD
Many think that you only engage 4WD when you start to get bogged down. This is NOT correct. Engage 4WD BEFORE you drive out onto the sand.
Traction Control / ABS
Turn OFF traction and ABS. These are life-saving when on the bitumen but when driving in sand they can be the cause of getting bogged.
Avoid wheel spin
If you start to spin your wheels, STOP. Other than creating a sand storm you will achieve nothing more than getting further bogged.
Keep up your momentum
Controlled momentum is key. Avoid sudden braking and acceleration.
Avoid sharp turns.
If you need to turn around on a narrower stretch of beach, turn up and away from the water first.
Your turning circle will be greater than normal.

Stopping
Avoid using your brake when stopping unless you have to. The sand will provide enough rolling resistance to bring you to stop without using them.
Get into the habit of rolling backwards and forwards a few times (about the length of your car) to compact the sand under your wheels before you get out. This gives you a firmer surface from which to take off from when its time to move on.

Dunes
Be aware that sand dunes change quickly. Never assume the shape and terrain of a sand dune.
Always drive directly up and down the face of a dune
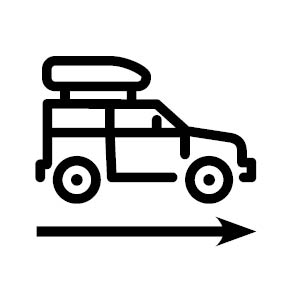
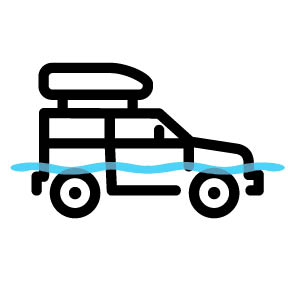
Water crossings can range from being extremely easy to incredibly dangerous. The simple rule of thumb is if in doubt, don’t. Even if your car is fitted with a snorkel it doesn’t mean that its new wading depth is the roof line. Knowing what your vehicle is capable of before you decide to drive through water is extremely important. Refer to your vehicle manual and look up “wading depth” to give you an idea of how much depth your vehicle can realistically handle. When crossing water, only one vehicle at a time. This is incase something goes wrong or the lead vehicle gets stuck (and potentially holds up the vehicles behind it in the water).
These are some basics about how to cross a water obstacle.
We highly recommend getting professional training before attempting any sort of water obstacle crossing that is higher than the running boards of your vehicle.

Check the depth and current
You are going to get wet. Before you take the plunge, observe the water flow. If looks too fast for you to walk safely across it then stop. It is most likely going to be too dangerous and you should look for an alternative route. If the current is OK then take a sturdy stick with you and start wading.
You are checking the bottom of the water obstacle, looking for large rocks, holes and other instructions that may impede your progress across. Take note of the average depth of the water. Knowing the surface that you are going to be driving on is also very important. Is it sandy, gravel or rocky?
If your water obstacle is in the north of the country, you also need to take into account the potential presence of crocodiles, who like to hang out where humans and animals come down to the water’s edge. If in crocodile country, take extreme care when checking a water crossing (this may mean you cannot walk it).
Prepare your plan
Have a plan and communicate it to everyone involved.
What line (route) are you going to take to get across?
What potential obstacles are there that may impede the crossing?
What resources do you have available to aid you in getting out of the water crossing if things go wrong?
Who is going to be in the vehicle and who is observing?
Prepare your vehicle and the crossing
You have a plan and everyone knows what is happening. Depending on the depth of the crossing, there are things that you need to do to prepare your vehicle.
- If it is a deep crossing, fit a tarp across the front of the vehicle. This provides a shield for the radiator fan and assists in creating a “bow wave”. The bow wave creates a temporary gap between the water and the vehicle, allowing the radiator fan to work without being underwater.
- Fit your recovery devices. Attach a tow or snatch strap to the front and rear of the vehicle. Loop the straps up onto the vehicle so that they are not in the way but easily accessible. The last thing you want is to be trying to attach a d-shackle to your recovery points when they are under water.
- Open a window on the downstream side of the car and ensure that all doors are unlocked.
- Move anything that might be damaged by water up as high as you can get it.
- Give all the electric components under the bonnet a spray with water repellant like WD40.
- Mark obstacles with sticks (if possible) so that you have a visual reference.
- If the exit point looks challenging then it might be a good idea to have a winch point already setup.
The crossing
- In a manual vehicle, select 2nd and do not change gears when in the water. Ensure you are in 4WD (you may also need LOW range) Keep your speed constant and do not stop.
- In an automatic, select a gear (1st or 2nd) and engage 4WD (again LOW range may be required)
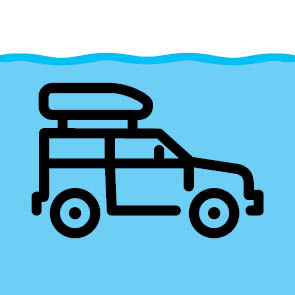
Once you have started the crossing and the vehicle is in the water, you are committed. DO NOT STOP. You need to ensure that your speed is enough to create that bow wave we mentioned earlier.

When you reach the other side
Once you reach the other side and you are clear of the exit point:
- Stop and allow water to drain from the car.
- Pump the brakes a few times to dry them out.
- Remove any tarps or covers placed across the front of the vehicle.
- Remove your recovery equipment
What happens if it all goes wrong
If the worst should happen during a water crossing then you need to enact your recovery plan.
- If the car starts to get turned downstream, spin the wheel and apply power to get the nose pointing into the current as quickly as you can. If you are sliding sideways and get caught on something then there is a high risk of rolling.
- If you get stuck and the car starts to float away, unless you can attach it to an anchor point immediately you may need to sink it. That means opening a DOWNSTREAM door and letting water in. This is preferable to getting washed downstream and rolling.
- If the water is still then exit through the window.
- If the water is over the bonnet, you run the risk of the engine sucking water in. Turn it off immediately. This will also shut down all the electronics, preventing them from shorting out.
- If you get stuck in moving water, and the vehicle appears to be safe, never assume. Conditions can change very quickly.
Western Australia. Land of the long road trip. There aren’t many places in the world where you can drive for 3-4 days and still be in the same state. For many who plan an adventure, the requirement to drive for a few days just to get to the start line is normal. Here are some hints and tips for long distance driving.
Know where you are going
Sounds pretty simple right? Put a little thought into where you are travelling and have a plan. Where are places you can stop and stretch the legs along the way? What places are suitable for toilet stops or where there might be a half decent coffee? If you need to stop for the night, where can you safely pull over?

Get a good night's sleep before you hit the road
It’s important to be well rested. You might be sitting behind the wheel but it is very fatiguing.
The general signs of fatigue are:
- yawning
- over-correcting
- taking longer to react
- not caring about things as much
- forgetting the last few minutes
- sore eyes
- blurred vision

Have a good co-pilot
Having someone to talk to and to share the drive makes travelling that much easier. Switch drivers every two hours. Being the front seat passenger is not necessarily restful. If you have older children then consider swapping with them for a back seat berth and taking the opportunity while they keep the other driving company.

Avoid the witching hours
Avoid travelling between midnight and 6am and 2pm to 4pm. These are where we have the least amount of alertness with crash researchers discovering that you are between two and six times more likely to be involved in an accident during these times.

Have a plan B
You might over-estimate how far you can travel and need to stop. Ensure that you build in some fat into any travel plans that allow you to pull over somewhere and get some sleep if you need it.
Don’t push through if things start to get foggy and be aware of the signs of fatigue.

Drink water
Avoid the sugary drinks and stick to water. You will feel that much better and the regular pit stops will aid in keeping you alert.
Good posture
It’s not just sitting in the right position but ensuring that you are comfortable and not putting any part of your body under stress when in the driving position.
Wear comfortable, loose fitting clothes and don’t forget sun glasses.

Eat right
Stick with lighter meals and snacks. They are more easily digested and won’t leave you feeling sleepy afterwards.
Power naps
If you are stopping for a little while to have lunch then consider having a power nap. Research has found even a 10 minute kip can improve alertness for the next hour. Avoid sleeping for more than 15 minutes and don’t use power naps as a substitute for a proper sleep.
The information highway
Your UHF radio is a great way to chat to other road users. Don’t stay on channel 40 if you want to have a good chat to a fellow traveller, switch to another agreed upon channel. This is a great way to get valuable road condition updates or even to get the low down on rest stops.

Are we there yet?
Don’t forget to include the kids in your plan. Ensuring that you have adequate activities to keep them entertained and occupied is critical for a successful road trip. Plan stops around their needs to run off energy, sleep and eat.
Our first response to this question is DON’T. Mud driving exacts a terrible toll on the surface you are travelling over, has detrimental flow on effects for the surrounding environment and can impact the future use of an area. On top of this, the wear and tear on your vehicle can be extremely expensive. Many locations have been lost as local authorities close them off to recreational 4WD access as a result of inappropriate behaviour by a minority.
With that said, if there is no other choice but to proceed along a muddy section of track or obstacle then we have some points you should consider.
Feel the pressure
Much like sand, mud does not offer much in the way of support to your vehicle. Lower your tyre pressure to somewhere between 40-60% of your road pressures. This will provide a larger footprint and maximise traction.
Highway pressures do not cut through the mud (unless the mud is very shallow).
Disable the safety stuff
Turn off stability control. You will only be moving at low speed and this will cause you more issues than it will solve.
Diffs
Lock the centre diff and if you are driving in a straight line then consider using your front and rear (if you have them) lockers.
Prior preparation prevents ...
If there is going to be mud then you ARE going to get filthy. Make sure you have a dirty gear bag where you can stick muddy recovery gear after use. Take plenty of water to wash hands. Make sure you have the inside of the vehicle “mud proofed” as much as possible. Consider getting yourself a set of the thicker rubber floor mats that have sides on them (to keep the mud in one place).
If the mud is deep, then consider connecting your recovery equipment prior so that you are not scrambling around in the mud looking for recovery points.
Check the depth
Treat it like a water crossing (because that is what it is). How deep is the mud you need to cross? You might need to mark the path across and make added preparations to your vehicle. Consider a tarp across the front (just like a water crossing) and spraying the sparky bits with WD40.

Shallow mud
Pick your lines well in advance and avoid sudden, last minute changes of direction. Use the highest gear possible with the lowest amount of revs. The aim is to keep wheel spin to a minimum. You will be either in high or low range.
Use your engine to brake instead of the brakes themselves (if possible) and be very gentle with the steering. Only steer under slight power (not when using your brakes)
Ruts can be your friend as they provide you with a set of “rails” that will keep you going in the right direction. If they are too deep then consider building them up to suit. Rocks are best (not wood as it gets very slippery)
In the likely event that your rear end starts to slide out, pick where you want to go to and turn the steering wheel towards it. Apply gentle power (do not use the brake). Always know where your wheels are pointing.
If you need to climb a steeper slope, look for an alternative route first. The risk of not making it and then sliding down backwards, uncontrolled, is a very real threat.
If there is no alternative, then ensure that you have picked your line. Prepare recovery gear in case you need to quickly swing into using your winch. Select a higher gear and DON’T let off the throttle. One of the single biggest reasons for failure at this point is hesitation. Once you have committed, you are committed.
Prepare for deep mud
These are usually associated with relatively small mud bogs which can be deceptive in their appearance. They are almost always filled with water. The problem with the water is that it hides what is underneath. Many vehicles have suffered catastrophic consequences after their owners thought that they could just drive through a “small” muddy puddle.
Treat them as any other water crossing. Give your vehicle some time to cool down before going through (hot metal expands and then rapidly contracts when hit with cold water) and use that time to check the obstacle. Poke and prod it until you know what lies beneath and are confident you can get through. The two main factors you are checking is depth and how firm the base is. Check for deeper ruts that may cause you to “bottom out”. Prepare your recovery equipment prior and have someone designated to grab your snatch strap and attach it to the recovery vehicle if it all goes wrong.
Use a tarp across the front of the vehicle and spray the electrical components under the bonnet with WD40 (no, we are not sponsored by WD40)
Check that your windscreen washer bottle is full, you will most likely need it.
If you can’t then DON’T. Look for another route.
Driving deep mud
Everything is dictated by the obstacle. The general rule of thumb is easy in, power out. As you enter the obstacle, the mud and water are going to create a rapidly increasing level of resistance. Gradually increase power to compensate. Rapid quarter turns on the steering wheel will also allow the wheel to “grab” more easily and can prevent some wheel spin. If fitted, you would engage your lockers. Leave traction control on.
Momentum is life. As long as you are moving you still have a chance of making it through. As soon as you loose forward momentum implement your recovery plan.

Post mud
Make sure you thoroughly clean your vehicle after any mud encounter. We would recommend going to a wash bay and using a high pressure nozzle. Don’t leave it too long. As the mud dries out it gets very hard and then starts to corrode what ever it is stuck to.
Give brakes are good wash, around the tyre bead, lights and mirrors (as well as the entire underbody). Check the radiator is not blocked with debris.
Don’t forget to clean and dry out all of your recovery gear. Don’t leave it sitting in the dirty gear bag.
There is only a handful of obstacles that give the majority of 4WD owners reason to pause. Hill climbs and descents would top the majority of owner’s lists. The problem is not the hill so much but the added complexities of the terrain that goes with it. They can be rocky, rocky with mud, muddy and sandy. Regardless, they all pose challenges and risks. Understanding that, in this instance, gravity is not your friend, is the first step in planning any hill climb/descent.

Gravity sucks
Well it doesn’t suck but it has an impact not only the vehicle but everything inside it. As your vehicle moves onto the gradient of a hill, the weight inside is transferred from either the front or rear axle (depending on your direction of travel). This has a corresponding impact on the traction of your tyres to the ground.
Hill climbing will result in less front wheel traction, effecting your ability to steer as precisely. There is also less weight on the axle, resulting in “wheel bounce”.
For very steep hill climbs, reducing the front tyre pressure can assist with reducing “wheel bounce” and provides a greater contact patch to the ground.
Prior preparation prevents ...
Like any obstacle, the first step (pun intended) is to walk it. You want to know if there are any hidden surprises along the way. What will be the best line to take and are there any potential anchor points if you need to use the winch. What is the ramp over angle or departure angle like and will your vehicle be able to negotiate it? Where can you park up when you complete the obstacle so you are out of the way? Is there somewhere you can “run-off” into if going down hill and it goes wrong?
Secure EVERYTHING in the vehicle before you commence. Don’t forget to make sure that your water bottle cannot get dislodged and end up under the brake or accelerator pedal.
Turn off stability control. It has the potential to cost you valuable momentum as the vehicle’s computer tries to “help”.
Going up
You have walked the hill and know what’s in store. Your gear selection will be based upon this. Once you have selected a gear, stick to it. Changing gears when on a hill climb will result in a rapid and immediate loss of momentum – both of which are not beneficial when hill climbing. If you are driving an automatic use the manual gear selection and choose 2nd. Depending on the gradient and terrain, you may also need to select Low Range.
Without going overboard, get your momentum going BEFORE you commence the climb and then keep your speed constant. Stay as straight as possible and ease off the power as you begin to crest the hill. If you loose forward motion and need to try again, reverse down the hill. NEVER turn around on the gradient.
Coming down
Before coming down a steep descent, walk it to make sure you know what you are getting into.
Slow and controlled is best when coming down a steep descent. Select Low Range, first gear and pick a line that keeps all four wheels on the ground. Stay as straight as you can and keep your speed constant.
If you loose control and cannot stop, it might be better (cheaper and safer) to aim for an immovable object like a tree or rock, to stop your uncontrolled descent than run the risk of a roll-over. If there are ruts then use them.
Never start a descent in neutral, always under power.
Every descent will be different and the vehicle, terrain and weather will all play a major part.
Sand dunes found in the desert are going to add some additional layers of complexity. For the most part, you are going to be more remote and need to ensure that you are self-reliant. Although there is less risk if encountering other vehicles, it should always be top of mind that you don’t know what is on the other side. Your vehicle is most likely going to be much heavier, as you will be carrying extra water fuel and food, then a trip out to the beach.
Let me guess ... tyre pressure?
Yep. Tyre pressure is more critical than ever. Your vehicle will be much heavier and you will have further to drive in soft sand. The floatation between 15-20PSI and 20-25PSI will be noticeably better.
With lower tyre pressure comes the risk of de-beading a tyre. Most of your driving will be in a straight line and at lower speeds, so this is minimal.
Lower pressures will also result in less fuel consumption. Yes, you read that right. Contrary to belief, running lower pressure in sand results in less resistance to move forward, resulting in less fuel use (compared with trying to power through on hard tyres)
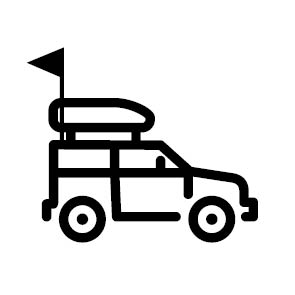
Be seen
A sand flag should be standard equipment, especially when travelling in sand dune country. Consider fitting it to the roof rack instead of the bullbar. This will give you more height and prevent the flag laying over as much when climbing a dune.
Look for a sand flag that can be broken down into pieces, which makes it easier for storing. The flags with a light at the top are a a bit of a gimmick (as you don’t really want to be driving in sand dunes at night) and not necessary.
- Always assume that a track is carrying two-way traffic and drive accordingly.
- If in doubt, turn around and find another route.
- Keep a safe distance between vehicles.
- Only one vehicle to tackle an obstacle at a time.
- Use UHF radios to communicate between vehicles if you are travelling in a convoy. Nominate a trip leader and someone to be “tail-end Charlie”.
If unsure of track conditions, STOP and WALK the section of track BEFORE driving through.

To join or not to join
Let’s be honest, heading out to a remote beach or travelling along a dusty, corrugated track is not everyone’s idea of a good time. For others, it is the start of the ultimate adventure. If you find yourself in the later category but with friends or family who are more the former, then you might consider joining a 4WD club.
Club’s are a great way to meet new, like minded people and travel with those more experienced. Most clubs are well organised, with regular training days for members, organised trips that will appeal to most interests and tastes and a knowledge base learned through doing.
The best way to see if a club is right for you and your family is to attend a meeting. All clubs host 4WD trips where potential members can tag along to get a taste for that club. If you like it, consider joining, if you don’t, try a different club.
To find your nearest club, visit the 4WD Association of WA There are also several well organised 4WD Clubs that are not part of the association. You can find information here on The 4WD Club of WA and the Isuzu Club of WA.
Alongside 4WD clubs, there is also an organisation called Track Care. Track Care is comprised of volunteers who enjoy exploring the great outdoors while giving back. They are involved in rehabilitation efforts, track maintenance and work closely with government agencies on a variety of community based projects. To find out more, visit the Track Care WA website.
Have fun learning
Buying a 4WD is a considerable, long term investment. Yes, the vehicle depreciates over time so it can’t really be called an “investment” however, the memories it will create with friends and family will last a lifetime. Getting some training from a professional is highly recommend to ensure that you safely get the most out of your vehicle.
There are plenty of companies that offer 4WD training. Most span a couple of days (usually over a weekend) and they encourage your significant other to come along and learn with you. Courses are a mix of theory (usually delivered in the field) and practical demonstrations. Under the watchful eye of your instructor, you then put what you have learned and negotiate a variety of terrain and obstacles.
We recommend looking for companies that offer smaller class sizes so that you have plenty of opportunity to practice what you have learnt.
Some companies offer to take client’s on a tag-along adventure, where you learn how to safely operate your vehicle, how to setup camp and experience a short getaway, all at the same time. For anyone that has never been off-road and never been camping then this is the course for you.
Check out Epic 4WD Tours or Adventure Off Road Training
Having an off-road adventure is a great way to spend time with friends and family however we mist remember that it is a privilege not available everywhere. When we drive onto the beach, there is a delicate balance being managed between us humans and the footprint we leave behind. Travelling through pastoral leases (stations), we are on someone’s property. Driving through national parks, state forest or even gravel roads, we are using infrastructure that someone has to maintain.
The way we (as individuals) behave off-road has far reaching consequences for everyone else. Choosing to leave rubbish behind, drive like a lunatic, leave gates open, have fires out of season or accessing areas that have been deemed off-limits WILL impact the majority who do the right thing. Apply common sense to ensure that we have access for all, for ever.
The Code Offroad is a brochure that has been put together by Track Care WA and various local and state government departments. It is a great resource to help 4WD owners how their actions can have long-lasting effects and what you can do to minimise your impact.
Everybody loves a good list. It’s a great way to ensure that you have everything that you need and nothing that you don’t. Use the resources below when planning your next adventure.
Camping checklist
Download and print out this basic camping checklist. It’s a great way to ensure that you don’t leave anything behind. Have different checklists to suit the type of adventure or activity that you are undertaking.
Emergency Contacts
Another useful list when heading out, this PDF has a list of Emergency Contacts. Print it out and keep it in your glovebox.
UHF Channel List
Make sure you are using the right channel and where you might find someone on “the air”. Another good list to print out and keep in the glovebox.
Personal Medical Information
If you are travelling in a group then it is a good idea to record Personal Medical Information in the event of a medical emergency. The best way to deal with sensitive information is to:
- Have everyone print out and complete the form, ensuring that they have as much information as possible included in the document.
- Make a copy of the document.
- Seal each copy in its own envelope, clearly writing their name and the date on it. (for added security they can sign the sealed section if they wish)
- Collect all forms and place one copy of everyone’s form into a folder (like a document folder) and the second into a second folder.
- Nominate two vehicles in your convoy and place one folder in each. Ensure that everyone knows where the two folders are being carried.
- At the end of the trip, return all sealed envelopes to their rightful owners.
If there are only two vehicles then ensure that you have a copy of your travelling partner’s records and vice-versa.
The envelope is only to be opened in the event of a medical emergency and ONLY at the request of medical professionals or if the person cannot answer for themselves. The information contained is PRIVATE and CONFIDENTIAL and could be the difference between life and death.
There is a plethora of online resources to assist you with planning the ultimate adventure.
Emergency WA
Emergency WA is a great state government resource that will show you where there are current and active incidents around WA.

Fuel Watch
Fuel Watch is another initiative run by the state government. Perfect for finding the best price for fuel.